Tupelo Designs LLC Awesome HAUL

Tupelo haul

Aloha Guys!

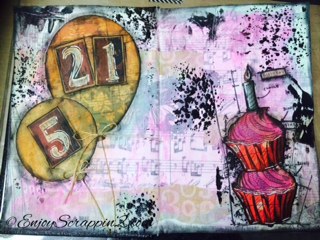
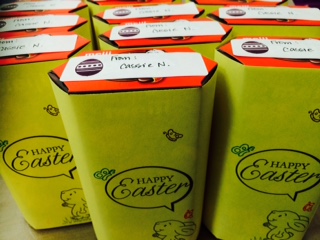
Today I’m sharing with you a Haul from Tupelo Designs LLC and I got some Cool New stuff at an Amazing price.  Tupelo Designs LLC is a One Stop Shop with Extremely Fast Shipping (even to Hawaii), which I think it’s incredible.  Not only that, they have Daily Promotions and sales to save you even more $$$.  I’m kind of Addicted shopping there.  It’s so Fun for me to shop and receive my products in literally in a day or two, which Amazes me Every time!

The promotion of the day when I purchased these were Buy 3 Stamps and get 1 FREE And Buy 3 Stencils and get 1 Free.  Both of these Sales on the same day, so I Had to take advantage of that, LOL.  I Highly Recommend you sign up for their Newsletter to get information on their Daily Deals or you can go check on their website Every day like I do!!  I will put a link below if you like to check out what I got and more informations for their store.  Thank you so much for stopping by and please subscribe for more inspirations and ideas.  Thanks again and Mahalo:)

Instagram, Twitter, Tumbler, Flickr, Bloglovin

@enjoyscrappin2

#enjoyscrappin2

FB: https://www.facebook.com/enjoyscrappin

http://youtu.be/BcB1xzUVg3w

For One Stop Shopping and Super Fast Shipping

http://www.tupelodesignsllc.com

Gerda Steiner Designs Brand New Stamp Heavy Friends Birthday Invitation

Gerda Elephant1

Gerda Elephant 2

Gerda Elephant 3

Aloha Guys!

Today I made a card using Gerda Steiner Designs Brand New Clear Stamp Set called Heavy Friends.  I’ve made a Birthday Invitation for my daughters Birthday party.  I LOVE this stamp set.  It has these adorable animals and it also has extra stamps to customize it to your needs.  My favorite is this Elephant stamp that I used for this card.  I love the fact that the elephant has his trunk raised up and you can add the water on top of his trunk or the heart, etc.  There’s so many things you can so with this stamp set.  I colored this image using my Stampin Up ink pad and Tim holts distress pad along with my finger dauber.  Since I was making about 10 of these, I decided to color it fast using the ink pads.  So even if you don’t have alcohol markers, color pencils or other mediums, you can still color your images using just your ink pads.  I also stamped out this fun birthday sentiment from Stampin Up (Retired) that you can make an interactive card.  It was made to use the spinning arrows, almost like a spinner.  I thought that was a fun addition to this card and I placed it above the elephant to make it look like his trunk is pointing to it.  I have a Full tutorial on how I made this card in the link below and I also have some supplies I used in the link below as well.  Thank you so much for stopping by and please subscribe and follow for more inspirations and ideas.  Thank you so much and Mahalo:0

Instagram, Twitter, Tumbler, FLickr, Bloglovin

@enjoyscrappin2

#enjoyscrappin2

FB: https://www.facebook.com/enjoyscrappin

http://gerdasteinerdesigns.com

Tupelo Designs LLC Intro To Peerless Watercolors

Peerless

Aloha Guys!

Today I’m doing an Introduction of the Peerless Watercolors for Tupelo Designs LLC.  These watercolors are not Brand new but Tupelo Designs LLC just got All the Peerless Watercolor Collections so I wanted to kind of introduce this product and talk a little more about how I store it and also share how I used them.  These are a Very High Quality watercolors and it’s very uniquely designed.  Instead of the watercolors being a caked form or paint form, this comes in paper form.  That is a very unique design and it’s very portable.  The watercolors are on this special paper and there are variety of colors and different collection for a very reasonable  price.  The colors are also Very Intense so this will last you a very long time.  I have a video explaining a little more about them and I share how I store them.  You can find what works for you as far as storage and there are a lot of options.  Check out the links below if you’re interested in these watercolors.  Some may be sold out, since the popularity of this product but they’ll be getting more in shortly.  Also, check out the video below for more information.  Thank you so much for visiting and please subscribe and follow for more inspirations and ideas.  Thanks so much!

https://youtu.be/fEdOcuGRgas

Instagram, Twitter, Tumbler, Flickr, Bloglovin

@enjoyscrappin2

#enjoyscrappin2

FB: https://www.facebook.com/enjoyscrappinhttps://youtu.be/fEd

For One Stop Shopping and Super Fast Shipping

http://www.tupelodesignsllc.com


OcuGRgashttps://youtu.be/fEdOcuGRgas

My First Art Journal Page-My Daughter Birthday Theme

Journal 1

IMG_7960IMG_7962

IMG_7959IMG_7961

Aloha Guys!

Today I’m bringing you something a little different.  I made My First art journal page video!!  I was doing some art journals on the side, playing around with different mediums, doing some doodling, watercoloring and things and I finally decided to make one on Film.  This was a big jump for me and something completely different than my normal card making.  What better way to start by Dedicating this page to my 2 daughters that had their Birthdays in March.  My oldest daughter turned 21 and my youngest daughter turned 5.  Those are the numbers you see on the balloons.

I cut out the Balloons and also used 2 cupcakes as my Focal points and I just started the process from there.  Once I decided on my focal images, it was pretty easy from there.  Unlike card making, I didn’t have to worry about the recipient liking the card I made for them so this was more on the Freestyle.  It was so much fun making it that I think I want to make another one already, lol.  By the way, this art journal style was highly inspired by Vicky from Clipncuts.  I’m sure you guys have seen her Amazing work and I’ll leave a link below to her channel below if you want to check it out.  She does Stunning work and I learned a lot from her in both card making and Art journals.

I feel that my art journals are more geared towards card maker style.  What I mean by that is, because I make a lot of cards, my art journals are more on the same level.  I will definitely be making more art journals in the future so stay tuned.  Some of the items I used on this journal is from Tupelo Designs LLC and I will have a supplies listed below.  Thank you so much for visiting my site and please subscribe and follow for more inspirations and ideas.  Much Mahalo:)

Check out the Full Tutorial:

Instagram, Twitter, Tumbler, Flickr, Bloglovin

@enjoyscrappin2

#enjoyscrappin2

FB: https://www.facebook.com/enjoyscrappin

For One Stop Shopping and Super Fast Shipping

http://www.tupelodesignsllc.com

Gerda Steiner Designs-Easter Treats using Hello Spring Stamp and MISTI

Easter Treat 1

Easter Teat 2

Easter Treat 3

Aloha Guys!

Today I want to share with you guys these Easter Treats that I made for my daughter’s class using Gerda Steiner Designs Hello Spring Stamp set along with my MISTI.  I made 20 of these treats to pass out for Easter.  Guess how long this Treat took to make?  It literally took me Less than 30 min to make all 20, starting from cutting the paper to assembling it.

Yes, this is a very simple design!!  I just cut 20 of 5 1/2″x8 1/2″ paper and stamped it using the Hello spring stamp set.  I Stamped out the grass first then I stamped the bunny, speech bubble and the sentiment all at once using the MISTI.  I then put all the butterflies and inked it up using 3 mini distress ink pads and also stamped them all at once.  Then I just wrapped the paper around the snack and put tape on the back.  Wrote her name on a address label sticker and attached it to the top.  It was SOOO Easy with the MISTI, I was really Amazed.

At first, I was skeptical of this MISTI Tool, thinking that it’s quite expensive for a Stamp positioner.  After playing with it a little and making these treats, I then realized the possibilities this tool has.  I am Really excited that I made the decision to purchase this.  I make A Lot of treat holder and gifts because I have young kids and this tool will help me out tremendously.

I Love this stamp set and my New best friend MISIT.  Perfect combination and a perfect match.  I do have a Full Tutorial on my Youtube Channel if you’d like to see the MISTI i action.  Thank you so much for visiting and please subscribe and follow for more inspirations and ideas.  Thanks so much, Mahalo

Instagram, Twitter, Tumbler, Flickr, Bloglovin

@enjoyscrappin2

#enjoyscrappin2

FB: https://www.facebook.com/enjoyscrappin

http://gerdasteinerdesigns.com

For One Stop Shopping

http://www.tupelodesignsllc.com

http://www.mysweetpatunia.com

TTCRD Color Challenge for March-April 2015

TTCRD 1

TTCRD 2

TTCRD 3

FullSizeRender 4

d3b5a161add3bb12c021945e41881128

Aloha Guys!

Today I want to share with you this card I made for Through The Craft Room Door’s Color Challenge for March-April.  This challenge ends April 15th, so you have plenty of time to participate in this challenge.  The above color pallet is what I chose for this challenge and I just love the colors.  I’ll have all the links below for more information on this challenge.

Just to talke a little about Through The Craft Room Door, this is a n Online community where they have fun challenges, prizes and how to’s and more.  They also have a Bi-Monthly magazine filled with Tutorial, Articles, How to, Kid’s Crafts, and much much more.  It only cost $18.00 a year fro 6 issues of magazine.  For more information, visit the link below.

I was lucky enough to be asked to be part of their amazing Design Team and I start April 1st.  I am super Excited and Honored to be a part of these Amazingly Talented ladies, I’ll definitely be learning a lot from them.  You guys will be seeing a lot more of the projects I make for them, and I’ll explain more about them as I go along.  For now, I just wanted to share this card I made for this Challenge.

For a Full tutorial on how I made this card, please visit my Youtube Channel and the Supply list will be available in the next issue of the magazine.  I hope you enjoyed this card and please check out the link below or click on the Blinkie on the side of my Blog.  You can always find the Links for the DT’s I’m on, at the side of my blog for more information.  Than you so much and please subscribe and follow for more inspirations and ideas.  Much Mahalo.

Instagram, Twitter, Tumbler, Flickr, Bloglovin

@enjoyscrappin2

#enjoyscrappin2

FB:https://www.facebook.com/enjoyscrappin

For a Full Tutorial,

https://youtu.be/_PSuKjQlev4

For TTCRD Color Challenge,

http://craftrmdoor.ning.com/forum/topics/colorchallenge-march-april-2015

For more information on TTCRD and Magazine Subscription,

http://craftrmdoor.ning.com

Gerda Steiner Designs Penny Slider Card

Gerda Slider 1

Gerda Slider 2


Aloha Guys!

Today I’ve made a card using Gerda Steiner Designs Roller Skating Bunny.  I’ll put the link below if you’d like to check it out.  He is super Cute!! As soon as I saw him, I knew I wanted to make a Slider card.  I’ve made a standard A2 size card and I cut a Silver Shimmery card stock at 4 1/4″x5 1/2″ to cover the entire card front.  I also cut a black Bazzil card stick at 4×5 1/4″ and a Chevron design paper at 3 3/4″x5″.  I printed the bunny out on Neenah Solar White card stock and colored the bunny using my Copic Markers.

Bunny: W5, W3, W1, R20

Roller Skates: R39, R29

Cupcakes: Y39, Y17, R85, R83, R39, R29

I used 2 penny’s and adhered 2 Semi-round Dimentionals in between the 2 penny’s.  This will be out sliding portion.  I used a Stampin Up’s punch to create a slit towards the bottom of the chevron card stock.  I attached the design paper to the black card stock first before punching.  You can create a slit with a craft knife or a paper trimmer as well.  I stuck the doubled penny in the slit to see how it moved and I punched a little more at the top of the slit to help it move a little more.  I attached the bunny to the penny using my hot glue gun because I wanted it to really stick on to the penny.  Because the bunny was longer, it was going all over the place so I attached a little pull tab using the same punch with black card stock.  You pull the tab back and forth and it slides like he’s skating.  I embossed a sentiment in white embossing powder on a 1/2″ black card stock and stuck it on the top.  This finishes my card, and I do have a Full Tutorial on my Youtube channel if you’d like to check that out.  Thank you so much for visiting and please subscribe and follow for more inspirations and ideas.  Thanks and much Mahalo.

Instagram, Twitter, Tumbler, FLickr, Bloglovin

@enjoyscrappin2

#enjoyscrappin2

http://gerdasteinerdesigns.com

Through The Craft Room Door Magazine is Now Available!! Check it out

The March-April 2015 edition of Through The Craft Room Door magazine is now available for your viewing pleasure in the “Subscribers Only Area”

The team has worked long and hard to bring you lots of creative tutorials, articles and inspiration cards to share with you this edition.

This edition also includes our challenge winners and top 3 picks for January and February.

Our featured Digi Artist is Gill of Little Claires. Her DT has provided delightful cards and projects for you to try your hand at and three wonderful images for you to play with.

Don’t forget to check out our Kid friendly craft section this week! A “Lava lamp” that is sure to delight your little one and our 101 tutorial is an EmbossedWax Resist technique that is so easy to follow along with for amazing paper effects!

And don’t forget to check out our challenge for a chance to win an awesome prize package!

If you do not currently subscribe to the magazine you will need to go to the top of the page on the website and click on the Subscription/Renewals tab.

I look forward to seeing you there!

https://youtube.com/watch?v=eDsZ3QalSog%3Flist%3DPLwTrE1CTPmGBzqk3K9_NLcKzUcqR-Z7S0

Thank you so much for visiting and Please Subscribe and Follow.  Thanks again and Mahalo

Instagram, Twitter, Tumbler, Flickr, Bloglovin

@enjoyscrappin2

#enjoyscrappin2

FB: https://www.facebook.com/enjoyscrappin

Check out this Fabulous Online Community where you can get tons of Inspirations with Challenges, Prizes and more!!!

http://craftrmdoor.ning.com

Altenew stamp and Spectrum Aqua Markers Tupelo Designs LLC

Tupelo Spectrum

Tupelo Spectrum 2

Aloha Guys!

I just did a Haul video about 2 days ago from Tupelo Designs LLC.  I got so many goodies to play with I could not wait to dig in.  First, I tested out the Spectrum Aqua Markers and I do have a Full Tutorial on my Youtube channel if you like to check it out.  I was really curious about these markers.  The markers come in sets just like their color pencils in color Family.  I got the Primary’s to try it out.  I blended with a water and a brush, as well as blending it with a Dove blender pen.  For more information, please check out my video.

Since I had everything spread out as I was doing the Product focus video, I decided to make a quick card.  I’m using the Altenew Hennah Elements as well as Label Love stamp set, which I LOVE

Instagram, Twitter, Tumbler, Flickr, Bloglovin

@enjoyscrappin2

#enjoyscrappin2

FB: https://www.facebook.com/enjoyscrappin

For One Stop Shopping and Super Fast Shipping

http://www.tupelodesignsllc.com

Tupelo Designs LLC HAUL

Tupelo Haul

Aloha Guys!

Today I wanted to share with you my Haul from Tupelo Designs LLC.  I got some Amazing products and I’m so excited to play and experiment with these.  I purchased some items that I’ve never heard of before.  They carry so many Unique items that I never knew about.  I purchased the Marion Smith Color Lab Starter set and this one kit can make tons and tons of color, it’s very highly pigmented.  I also got some of the New Faber Castell Metallic Gelatos, Sectrum Aqua Markers, 3@rt’s paints, and more.  My wish list keeps growing and growing.  Lately, I’ve been very interested in Art journaling and I purchased some of these items for my Art journal I’m going to make with you guys on Camera.  I’ve never filmed my ACT’s or my Art journals but I will be doing these shortly, I’m still at the collecting phase, lol

I Have a Full Tutorial on my Youtube channel if you’d like to see All of the items I got.  I hope to see you soon with New product Focuses.  Thank you so much and please subscribe and follow for more inspirations and ideas.  Thanks

Instagram, Twitter, Flickr, Bloglovin, Tumbler

@enjoyscrappin2

#enjoyscrappin2

FB: https://www.facebook.com/enjoyscrappin

For One Stop Shopping and Super Fast Shipping

http://www.tupelodesignsllc.com