How to Cut Your Own Handwriting on Scan N Cut

Aloha Guys!

I wanted to quickly share how you can cut your own Handwritingon the Scan N Cut.  Scan n Cut has become very popular, so I wanted to share some tips on how you can use this machine in different ways.  If you have a Scan N cut, this might be helpful, otherwise you don’t need to watch it.  Thank you so much for stopping by and I’ll be back with another video shortly.  Thanks again

Follow me on my Social Medias

For more inspirations, visit my Youtube channel:
https://www.youtube.com/my_videos?o=U

CAS Card Using Bird Crazy and Copic Markers-Tupelo Designs LLC

IMG_8696

IMG_8698

IMG_8697

Aloha Guys!

Today I’m making a very Clean and Simple DT Card for Tupelo Designs LLC using this Bird Crazy stamp set and some Copic Markers.  I’m Super excited to share with you guys that Tupelo Designs LLC is now carrying Copic markers!! Yay!!  I decided to make this card really simple because I wanted to go over some things regarding Copic Markers.  You can get a full step by step on how I made this card by watching the video link up above.

I wanted to go over some general information regarding these markers that might be handy to know.  First off, you can keep track of your copic markers by downloading a Free Color chart from copicmarker.com and I’ll leave a link below or you can even purchase this Hex Chart from Sandy Allnock’s website for several dollars, which is a handy tool as well.  She designed this chart to help us have an easier time finding the right color combinations that go well together and I think this chart is very helpful.  The copic markers have a different numbering system that you should know in order to choose the right combinations.  You can also get more detail information in this on the copic website as well.

These markers are alcohol base markers and with alcohol based markers, it’s very important to use the right ink that’s compatible with alcohol markers.  The most popular ink pad to use with these are Momento Tuxedo black ink or My Favorite Things Hybrid Licorice Black ink.  My personal favorite is the My favorite things Hybrid ink but it’s personal preference.  Choosing the right paper also makes a huge difference on how they blend.  It’s best to use a specialty card stock such as Neenah Solar White or  Spectrum Noir card stock just to name a few.  These card stocks have a slick surface, which will help with the markers to sit on top of the paper longer for a better blend.

For todays card, I decided to use this Bird Crazy stamp set from stampers anonymous.  I think these birds have the funniest expressions and each bird has their own personality which I love.  I stamped it out using My favorite things black licorice hybrid ink on Neenah solar white card stock and chose out several colors to color the birds.  I made this bird very colorful since this was a very simple card.  I found this very funny sentiment to go along with these birds from the Dylusions stamp set from my stash.  To see a full step by step on how I made this card, please watch the video up above or head on over to my youtube channel.  For all the supplies I used on this card will be in the description below. I thank you guys so much for stopping by and please subscribe and follow for more inspirations and ideas.  I’m super excited that Tupelo Designs LLC is carrying copic markers and I’ll be sharing more products using these markers in the future.  Thank you so much and I hope to see you back next time.

Blog: http://enjoyscrappin2.com
Facebook: https://www.facebook.com/enjoyscrappin
Coloring group on FB: https://www.facebook.com/groups/enjoyscrappin2/
Instagram: https://www.instagram.com/enjoyscrappin2/
Twitter: https://twitter.com/enjoyscrappin2
Flickr: https://www.flickr.com/people/114801714@N07/
Tumblr: https://www.tumblr.com/blog/enjoyscrappin2
Bloglovin: https://www.bloglovin.com/people/enjoyscrappin2-9219655

http://static.inlinkz.com/ppr.js

The May-June 2015 edition of Through the Craft Room Door magazine

Cover

Aloha Guys!

The May-June 2015 edition of Through the Craft Room Door magazine is now available in the Subscribers Only area for your viewing pleasure.

http://craftrmdoor.ning.com/

New this time is the addition of 3 awesome videos which include an fantastic product focus for the MISTI (r) stamping system!

We have three (3) awesome images from our featured digi artist Olga of Little Blue Button for you to download and play with.

We have quite a few amazing tutorials that include a lovely kids craft (just in time for Mothers Day!) and one up-cycling an old pallet into a fantastic flag to name a few.

We also have several articles and more product reviews we hope you fine interesting as well as numerous inspiration for cards in general, country recognition … and don’t forget all those graduations right around the corner.

The new challenge is a Sketch Challenge that I hope gets everyone up at their craft tables so they can join us!
So grab your favorite beverage, kick back and relax!
If you do not currently subscribe to the magazine you will need to go to the top of the page on the website and click on the Subscription/Renewals tab or click HERE
I look forward to seeing you there!

Gerda Steiner Designs Graduation Card

IMG_8136

http://youtu.be/rnDZU7kpOsk

Aloha Guys!

Today I’m sharing with a Graduation card using Gerda Steiner Designs Graduation Girl Digital Image.  This little girl is a Digital Image you can purchase and the Sentiment is also included in the set which is also a Plus!!  I Love her, she is super Cute!! I printed her out on Neenah Solar White 80lb Card stock and I cut it using the Simon Says Stamp Stitched rectangle die.  I also cut out a Design Paper using the same die and another using the Mama Elephants Femme Frame die.  All the supplies will be listed below if you’re interested.

I colored her out using my Copic Markers today and the colors I used are as also listed below.

Skin: E00, E21, E11, R20

Hair: E59, E57, E53

Cap and Shoe:  W9, W7, W5

Gown: R89, R29, R24

I also used a White Signo and Gold Signo Gel Pen for added finishing touches.  It’s a pretty simple card today and I hope you like this card and check out my Youtube channel where I have a Full tutorial on how I made this card.  I apologize that some of the coloring portion got cut off because my camcorder kept cutting off.  Thank you so much for stopping by and please check out the links below for all the supplies I used on this card.  Thank you and Mahalo:)

Instagram, Twitte, Tumbler, Flickr, Bloglovin

@enjoyscrappin2

#enjoyscrappin2

FB:https://www.facebook.com/enjoyscrappin

http://gerdasteinerdesigns.com

Through The Craft Room Door’s DT Sketch Challenge for Magazine

TTCRDSketchMay2015

TTCRD Sketch 2

Aloha Guys!

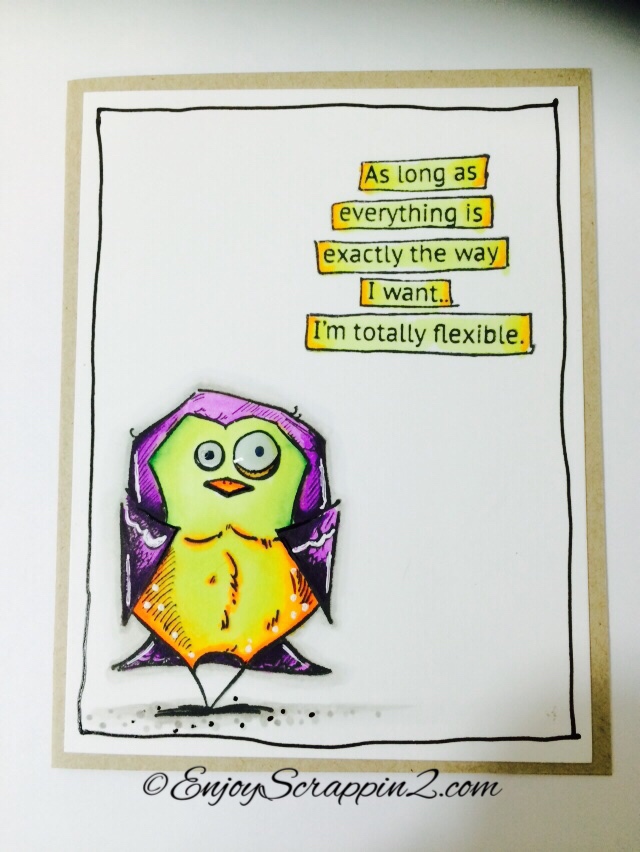
Today I want to share this card I made for Through The Craft Room Door’s DT Sketch Challenge Card.  More information regarding this card and All the other cards that the DT members made will be available in the next issue of the Magazine.

The Magazine is Only $18 for a Full Year Subscription and it is Filled with Techniques, Tutorials, How tos, DIY, Kids Crafts, Inspirations and More…. It’s jam packed with all the Crafting Goodness only for $18 a Yr.  It’s an Online Magazine and an Online Community.  You’ll be getting 6 Issues in a year since it’s Bi-Monthly Magazine.  Even if you don’t subscribe, you can always be a part of the Community and participate in Challenges of Prizes from different Sponsors.  Please Check out the link below for more information regarding the magazine and to become a part of this amazing Community.  Thank you so much for visiting and please subscribe and follow for more inspirations and ideas.  Thanks so much, Mahalo:)

Instagram, Twitter, Tumbler, Flickr, Bloglovin

@enjoyscrappin2

#enjoyscrappin2

FB: https://www.facebook.com/enjoyscrappin

For More Information Regarding the Magazine/Website

http://craftrmdoor.ning.com

Gerda Steiner Designs Post it Note Holder for Easter

Gerda post it 1

FullSizeRender 2

IMG_7814

IMG_7815

Aloha Guys!

Today I’m sharing with you this Post it Note Holder using Gerda Steiner Designs Hello Spring Stamp set.  This is going to be my kids teacher’s Easter gifts, part of it anyway.  I made the board for the post it notes using chipboard.  I cut the chipboard measuring 4″x4″ and also cut out a design paper the same size. I adhered the design paper to the chipboard using Yes Paste.  Yes paste is a very thick glue that has a paste consistency which is really good for altering book’s, scrapping, and all sorts of things.  It’s a very strong adhesive that doesn’t crinkle up the paper and it sticks very nicely.  After adhering the design paper, I used the WRMK Corner chomper and I used the 1/2″ side to round all 4 corners of the chipboard piece.  I also cut a small strip of the same design paper in 1 1/4″x 1 3/4″ to cover the binder clip to match the chipboard and I used score tape for this as well.

After all the preparations are done, now comes the fun part.  From the Hello Spring stamp set, I’m using the adorable bunny, one of the flower, and the grass.  I stamped out the bunny first and I cut out a mask for it using the 3M Post it Notes.  I stamped the bunny on the bottom right corner of the post it note and placed the mask on top.  Then I stamped the flower in the bunny’s hand and when I take the mask off, it’ll look like he’s holding it.  I also stamped the grass by the bunny’s feet and all across the post it note.  I colored all the images using my Prismacolor Premier pencils and blended it using gambol and a blending stump.  After coloring all the images, I put scor tape on the back of the post it note and attached it to the chipboard we made.  I attached the clip on top of the board and the post it and tied a ribbon on the clip.  This finishes my project for today and all the Supplies I used are listed below for your convenience.  For a Full tutorial on how I made this Post it Note Holder, Please check out my Youtube channel.  Thank you so much for visiting and Please subscribe and follow for more inspirations and ideas.  Thanks so much, Mahalo

https://www.youtube.com/channel/UCSmaap84Uvp7NPOcnJXG

Instagram, Twitter, Tumbler, Flickr, Bloglovin

@enjoyscrappin2

#enjoyscrappin2

http://gerdasteinerdesigns.com


http://gerdasteinerdesigns.comV9AIns

Alo

My First DT Project for TupeloDesignsLLC

2015/02/img_7626.jpg

2015/02/img_7627.jpg

Aloha Guys!

Today I’m sharing my First DT project fur TupeloDesignsLLC. I’m very excited for this opportunity and you’ll see a lot of projects for them in the future:)
Today I’m doing some Watercoloring using Koi Pocket Field Sketch Box with 24 colors. If you’ve been watching any watercolor tutorials on YouTube for cards, you probably have seen this watercolor set being used a lot. This watercolor set has a Very Intense pigment so it’s very easy to achieve colors on images fast. It’s conveniently packages with a water-brush for those on the go. I’m also using the Stampendous Large Butterflies Trio set and I’m using the largest one. I embossed it using Versamark with Hero Arts White embossing powder onto Tim Holtz Watercolor paper. Which is conveniently cut to a card size and I used my favorite Milwaukee heat gun to melt the powder. For the Watercolored butterflies, I worked on it section by section. I drop some clean water onto where I’m coloring and just dropped in the paint and let the water do all the coloring for me. The colors will only travel Only where the water is. I blended the Blue and the Purple which I think is a perfect combination. I then Splattered some paints using the same colors to give a unified look. For a Full Tutorial on how I made this card, please check out my YouTube channel, which will be listed below. I’ll also leave a supply lust below for your convenience. They also have FREE Shipping on purchases of $65 and over and they also have flat rates shippings depending on the amount you spend. They now have A Loyalty Program where you can accumulate points to spend on your next purchases. Joining is FREE and when you first join, you’ll automatically get 500 points and after that you get 2 point for each dollar you spend. I think that’s Awesome!!  They carry a variety of products for variety of crafters so go check them out. If you don’t see what your looking for, please email Mike and Mike’s email is always at the bottom of the website. They are always open to your suggestions!! Also please check out Jane’s Youtube Channel where she’ll do Product shares and some Amazing Mixed Media work. Thank you so much for visiting and please subscribe for more inspirations and ideas!! Thanks so much, Mahalo

http://www.enjoyscrappin2.com
https://www.youtube.com/channel/UCSmaap84Uvp7NPOcnJXGV9A
Instagram, Twitter, Tumbler, Flickr, Bloglovin
@enjoyscrappin2
#enjoyscrappin2
FB: http://www.facebook.com/profile.php?id=100006270948703

For Jane’s Youtube Channel:https://www.youtube.com/channel/UCF0JiXLBIhjbTs428xHWrMQ
For All Your Crafting Needs, visit
http://www.tupelodesignsllc.com

Whimsy Stamp-Angelica Copic Coloring

Aloha Guys!

Today I’m doing some coloring.  I haven’t been feeling too good for couple of day so instead of going in my craft room, I decided to just color in my room.  The image I’m coloring this Image I purchased through Whimsy Stamps.  I got the Digital version but they may have a stamp version too.  Her name is Angelica and I decide to color with my Shinhan touch Brush Markers.  Those of you that are not Familiar with this marker, you can check them out at Blick’s Studio.  I hope you like this coloring video, Thank you so much for visiting.  Please press the like button if you like this video and Subscribe for more inspirations and ideas.  Much Mahalo


DIY Embellishment with Nail Polish

Error
This video doesn’t exist

Aloha Everyone!

Today I’m playing with Nail polish, not to paint my nails but using it to make my own embellishments.  Choose Glittery and Solid colors to jazz up your die cuts.  It’s really sparkly.  I have tons and tons of polishes just sitting there collecting dust so why not use it up.  I’m sure all os you have tons of polishes as well.  So try it out and experiment, I like the way mine turned out.  Let me know how yours look, I’ll love to see what you came up with.  As always, Thank you for visiting my site and Please Subscribe if you want more inspiration and Ideas.  Thanks again.


Please visit my Youtube Channel:

https://www.enjoyscrappin2.com/channel/UCSmaap84Uvp7NPOcnJXGV9A


Please support my Online Stampin Up store:

http://enjoyscrappin2.stampinup.net/


How I make My Flower Centers

Aloha Everyone!

I seem to be having some difficulties with my Blog today.  I wanted to share with you how I make amy Centers for my Paper and Fabric Flowers.  I uploaded this and several other videos and I wanted them uploaded separately in order to find it easier but it all got uploaded all at one.  So…I’m trying to upload this video again but it completely shut me out and this is 2nd time today trying to upload this.  For those of you who watch this video already can disregard this and those of you that haven’t seen it can enjoy watching.  Thank you so much for your support and Please subscribe for more inspirations and Ideas.  Thanks again!


Please Check out my Youtube channel;


https://www.youtube.com/cannel/UCSmaap84Uvp7NPOcnJXGV9A

My online Stampin Up Store:

https://enjoyscrappin2.stampinup.net/