Gerda Steiner Designs Post it Note Holder for Easter

Gerda post it 1

FullSizeRender 2

IMG_7814

IMG_7815

Aloha Guys!

Today I’m sharing with you this Post it Note Holder using Gerda Steiner Designs Hello Spring Stamp set.  This is going to be my kids teacher’s Easter gifts, part of it anyway.  I made the board for the post it notes using chipboard.  I cut the chipboard measuring 4″x4″ and also cut out a design paper the same size. I adhered the design paper to the chipboard using Yes Paste.  Yes paste is a very thick glue that has a paste consistency which is really good for altering book’s, scrapping, and all sorts of things.  It’s a very strong adhesive that doesn’t crinkle up the paper and it sticks very nicely.  After adhering the design paper, I used the WRMK Corner chomper and I used the 1/2″ side to round all 4 corners of the chipboard piece.  I also cut a small strip of the same design paper in 1 1/4″x 1 3/4″ to cover the binder clip to match the chipboard and I used score tape for this as well.

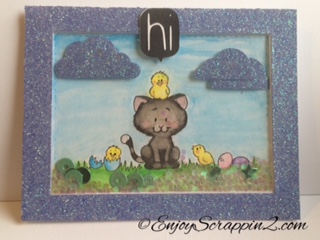
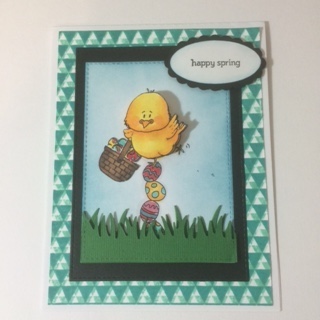
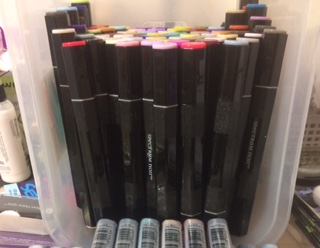
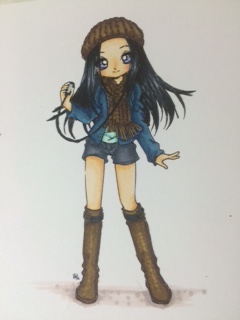
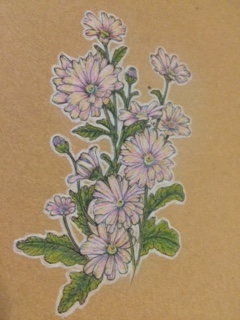
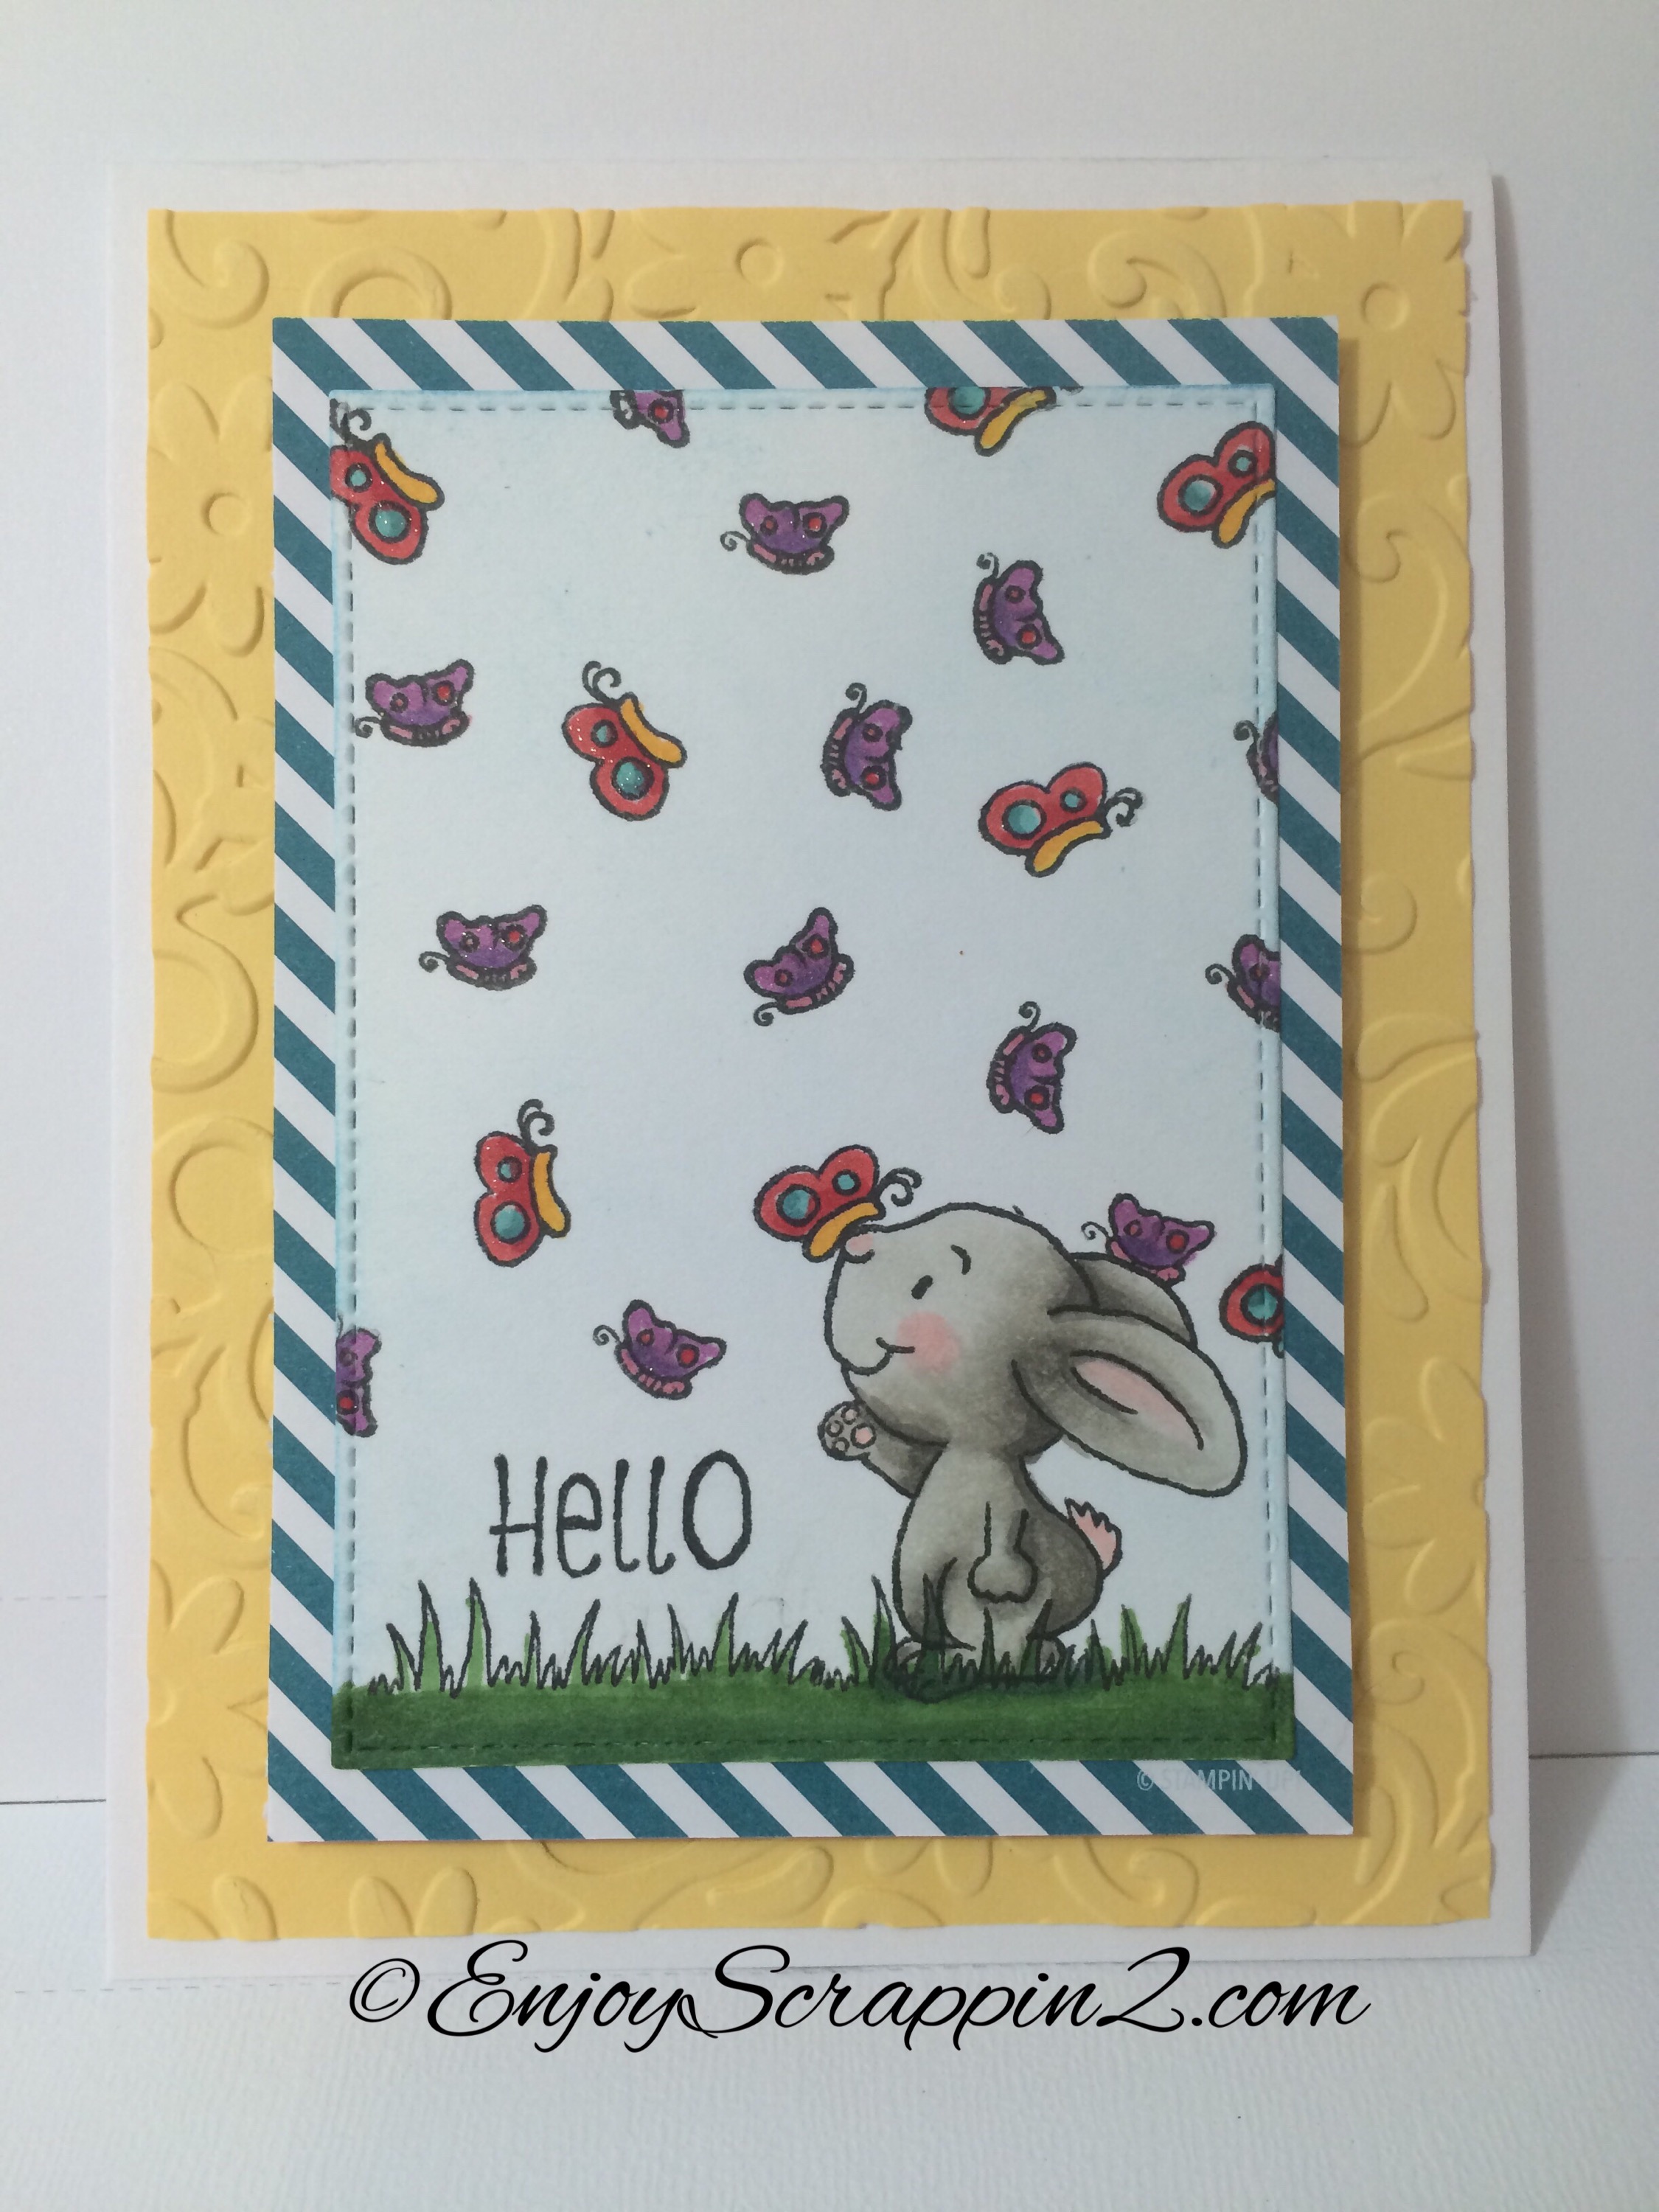
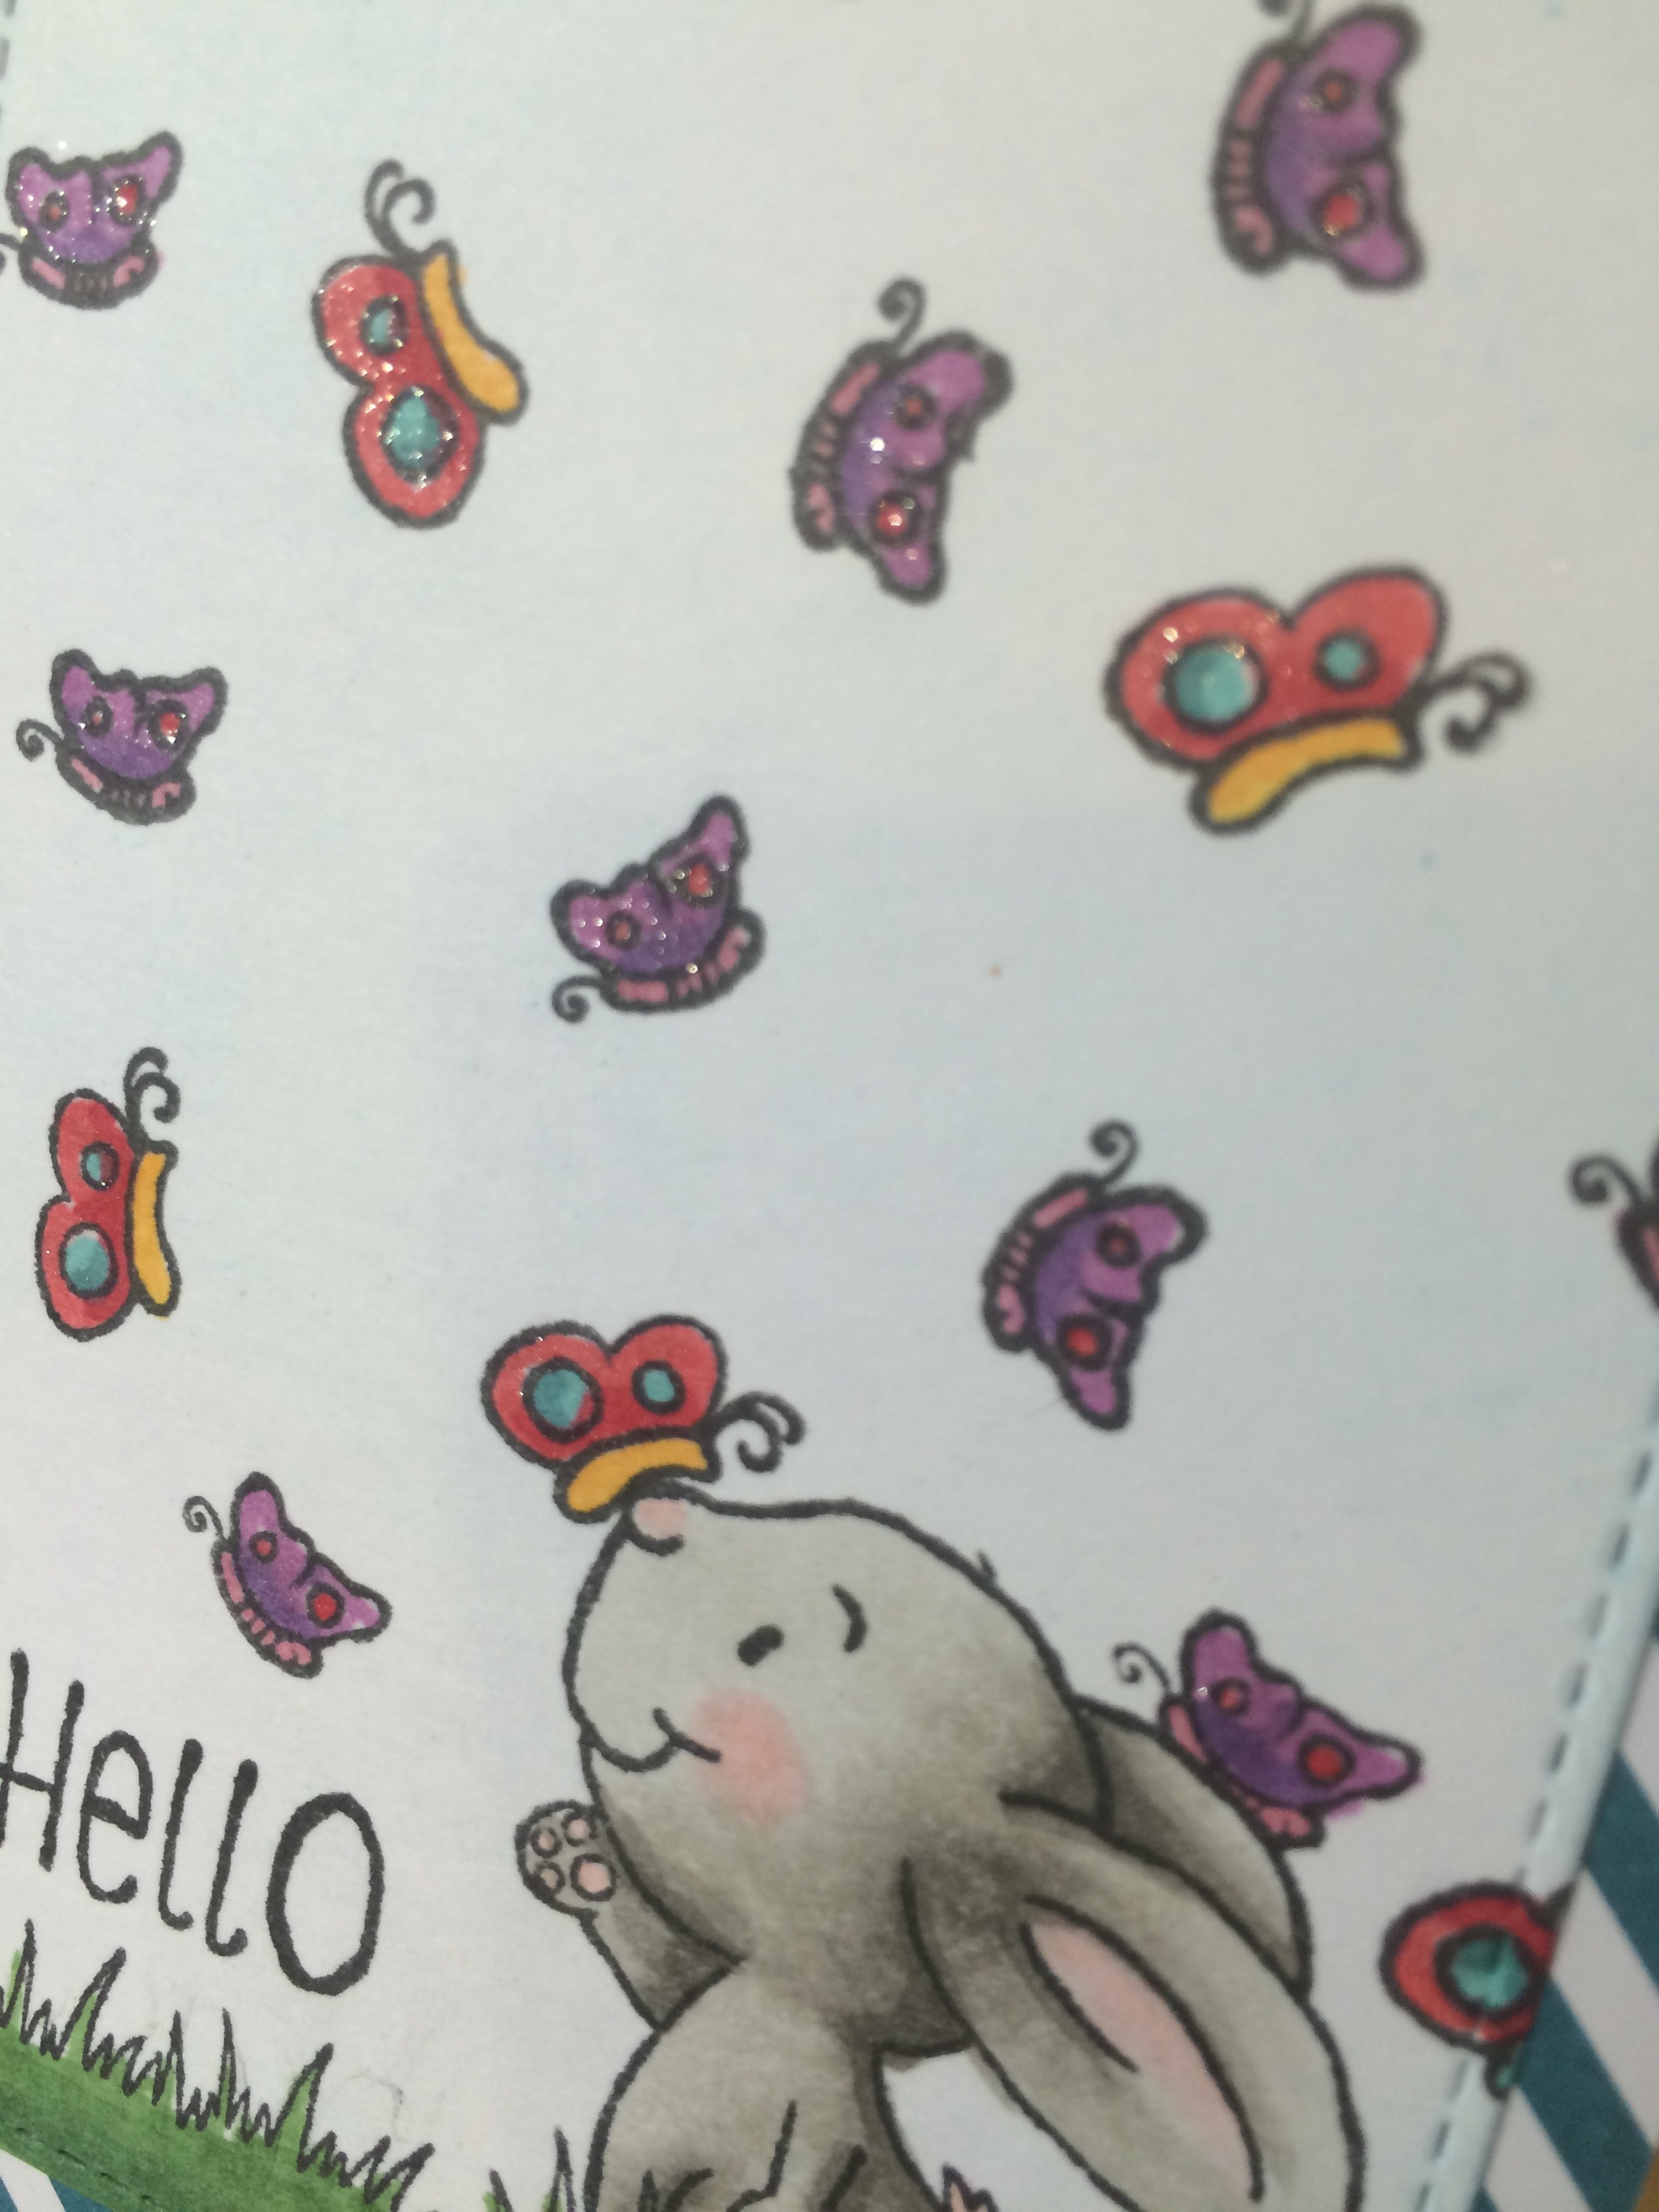
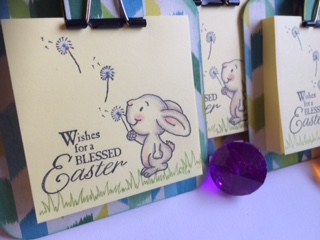
After all the preparations are done, now comes the fun part.  From the Hello Spring stamp set, I’m using the adorable bunny, one of the flower, and the grass.  I stamped out the bunny first and I cut out a mask for it using the 3M Post it Notes.  I stamped the bunny on the bottom right corner of the post it note and placed the mask on top.  Then I stamped the flower in the bunny’s hand and when I take the mask off, it’ll look like he’s holding it.  I also stamped the grass by the bunny’s feet and all across the post it note.  I colored all the images using my Prismacolor Premier pencils and blended it using gambol and a blending stump.  After coloring all the images, I put scor tape on the back of the post it note and attached it to the chipboard we made.  I attached the clip on top of the board and the post it and tied a ribbon on the clip.  This finishes my project for today and all the Supplies I used are listed below for your convenience.  For a Full tutorial on how I made this Post it Note Holder, Please check out my Youtube channel.  Thank you so much for visiting and Please subscribe and follow for more inspirations and ideas.  Thanks so much, Mahalo

https://www.youtube.com/channel/UCSmaap84Uvp7NPOcnJXG

Instagram, Twitter, Tumbler, Flickr, Bloglovin

@enjoyscrappin2

#enjoyscrappin2

http://gerdasteinerdesigns.com


http://gerdasteinerdesigns.comV9AIns

Alo

Make It Crafty’s FB Coloring Challenge

MIC 1

MIC 2

MIC 3

Aloha Guys!

Happy Weekend:)  Normally, I don’t really do crafting and posting on Weekends because I’m spending time with my Kiddos but I’ve been coloring this image since Friday, for the Make it Crafty FB Coloring Challenge and I wanted to finish her up.  Make it Crafty is Celebrating their 4000 Likes and she’s having all kinds of contests going on and there are Lots of prizes to be won.  I wanted to color this Fairy for the Contest and this image is called Fairy-toe-Kiss and I’ll put a link below if you’d like to check it out. It took me over 2 hrs to color her and I tried my best to record the coloring and because it took so long, my Camera battery died on me, lol.  I did record parts of it that you can check out on my Youtube Chanel, if you’d like.

I had so much fun coloring her and I’m sure I’ll be coloring her again!!  After coloring this, I cut it out using my Lawn Fawn Large Stitch Rectangle die which covers the whole A2 size Card front.  I’ve combined several of their Challeges which are, Coloring Wild hair color(not what you normally color hair with), One-Layered Card, CAS Card, and Make the Wings Transparent.

I attached her to my card front and stamped out a simple sentiment and added some sequins.  For her wings, I added clear wink of stella and put glossy accents on it to make it shiny. I also added my Signo white gel pen to put highlights on her hair and dress.  That’s just basically it.  Clean and Simple.  I had so much fun coloring her and I’ve already entered her onto the contests that’s going on the FB.  There’s still time to participate in this fun, go ahead and check out Make it Crafty’s FB Site.  Thank you so much and please subscribe and follow for more inspirations and ideas.  I thank you so much for visiting and Much Mahalo:)

Instagram, Twitter, Tumbler, Flick, Bloglovin

@enjoyscrappin2

#enjoyscrappin2

FB:https://www.facebook.com/enjoyscrappin

Make it Crafty’s FB:

https://www.facebook.com/groups/makeitcrafty/

My Youtube:

https://www.youtube.com/channel/UCSmaap84Uvp7NPOcnJXGV9A

Gerda Steiner Designs Kitten with Chickens Shaker Card

Gerda Shaker 1

Gerda Shaker 2

Aloha Guys!

Today I’m making a card for Gerda Steiner Designs March Challenge Card.  I’ll be making a Shaker card today, I love shaker cards:)  For those of you that are not familiar of this Progressive Challenge that Gerda has, I’ll explain a little about it.

Once you purchase an image and participate in the current challenge she has going on.  Next Month, she’ll email you the following month’s challenge image for FREE.  This is an ongoing thing as long as you participate in her challenges, which is super Awesome!!  This month’s image is this Kitten with Chickens.  I’ll leave a link below if you’re interested.

Today I’ll be doing some watercoloring so I printed this image out on watercolor paper.  When I’m printing a Digital image on watercolor, I print them out on 90lb. Strathmore paper so it doesn’t jam in my printer.  I then cut out the image using the Lawn Fawn’s Large Stitched rectangle.  I also cut a glitter card stock as well as 6 frames that’s bigger that my focal panel to create a frame for my Shaker.

I colored this using a Simply Art watercolor pallet.  This is a very inexpensive watercolor set that you can purchase for $6-$8 depending on where you get them.  This is my first time trying these out and surprisingly, the colors were very vibrant.  I noticed that it does give a chalky finish once the paint dries.  If you rub your fingers across it, it rubs off on your fingers a little.  So you might want to use some type of fixative on it if you’d like.  For me, this was going inside a shaker, so it didn’t bother me but in the future, I might add some fixative.  I out together my shaker card and put some paper cut sequins, stars and hearts out of several dies and also added some iridescent glitter inside.  I didn’t use any foam adhesive today, instead I made the dimension using card stocks.  I do have a Full video tutorial on this on my Youtube if you like to check that out.  Thank you so much for visiting and Please subscribe and follow for more inspirations and ideas.  Thanks so much and Mahalo:)

http://youtu.be/xWUPwhZT0Wg

Instagram, Twitter, Tumbler, Flickr, Bloglovin

@enjoyscrappin2

#enjoyscrappin2

FB; https://www.facebook.com/profile.php?id=100006270948703

Make It Crafty Clean and Simple Design Team Call

cas-dt-call-feature-banner

mic cherry 1

Mic cherry2

Mic cherry 3

Aloha Guys!

Today I’m making a card for Make It Crafty’s Clean and Simple DT Call.  If you’ve been following me on Instagram and Facebook, you’ve seen that I’ve been obsessed with Make it Crafty’s images.  I colored the Characters when I did a Product focus on the Spectrum Noirs and I love coloring the Flower set that has the Beautiful Rose.  I love coloring and I’m in love with MIC’s images, I want to buy them all, lol

For my card today, I’m using their Newest Release of Spring Flower set.  I fell in love with the Cherry Blossom as soon as I saw them and I couldn’t wait to get my hands on them.  If you purchase the set which includes 4 flowers, you automatically get 15% off which is super good deal.  That’s what I bought, but you can definitely purchase them individually.

I printed the Cherry Blossom out on Strathmore 80lb. watercolor paper and cut the image out of Mama Elephant’s Femme Frame die.  I also cut a black Bazzil card using the same die but I used the Scallop one.  My card base today is Neenah Desert Storm 100lb.  I printed several of these flowers and I colored them using Tim Holtz Distress markers using a Stampin up blender pen.  You can use any blender pen you have, you can even use a water brush ins tread.  In my opinion, the blender pen gives more control and this is perfect since the background is going to be very loose.  After coloring some of the Cherry blossom and I fussy cut them out to give more dimension to my front panel.

For my background, I used the Cracked Pistachio and Peacock feathers and made a very loose background for my Flowers.  I also put Picked Raspberry on all the flowers with lots of water so it’ll kind of ooze out and blend with the background I created.  I rally love this loose watercoloring!  For the sentiment, I used a stampin up’s stamp set and I embossed it using Versafine Onxy pigment ink with clear embossing powder.  These Flowers DO Come with Sentiments so you can use those if yo like.

I attached everything together and added some Pretty Pink Posh Clear sequins in different sizes.  I also put some clear Wink of stella and put Glossy accents on the popped up Cherry Blossoms.  This finishes my card for today and I hope you enjoyed.  All the supplies I used in this card will be located below, for your convenience.  I’m Crossing My Fingers!!!  I would LOVE to be one of their DT members!!!  This will be such a great experience and if I don’t get Chosen, that’s Ok too.  I’ll still be enjoying her images:)  Thank you so much and Much Mahalo!

Instagram, Flickr, Twitter, Tumbler, Bloglovin

@enjoyscrappin2

#enjoyscrappin2

FB: Joyce Nakaoka

For Other Supplies
http://www.tupelodesingsllc.vom

http://www.makeitcrafty.com

Tupelo Designs LLC DT Project using Alte New Stamp set

Alte 1

Alte 2


Aloha Guys!

Today I made a card for The Tupelo Designs LLC’s DT Project using the New Alte New Stamp set, Painted Butterflies.  This is a very Beautiful stamp set that basically does all the work for you.  This is also a 3 Step stamp set which means there’s different layers that can go on top of each other to create this multi colored painted look.  This is a very popular set so it might be sold out but at Tupelo Designs LLC, you can Pre-order them so you’ll have yours as soon as it becomes available.  And you know how Fast Their shipping is, Amazing!  I’m also using another New stamp set from Impressions Obsessions which also can be Pre-ordered.  It’s a distress brick wall, and it has so much texture, it’s really cool.  I’m using a lot of New products today, I might as well play with them all at once, right?  Lol

For my card base, I have a top folding A2 size card stock which is Neenah, by the way.  I also cut another white card stock measuring 4″x%5 1/4″ and another cut using the MFT’s stitched rectangle die.  I’m going to make my own background paper using the Obsessions Impression’s Background stamp inked up with Tim Holtz distress mini ink pad.  I do have the whole collection of the full size ink pads which I still use, but sometimes the little ones are just easier.  I stamped out the brick wall and put it aside and will work on our focal panel.  I stamped out the Thank you sentiment using the same Alte New stamp set and I stamped out one of the butterflies using the New Cracked Pistachio and Peacock feathers.  The 2nd butterfly was stamped using the New Abandoned coral and Festive berries.  I also stamped out a small butterfly using the same abandoned coral.  After doing so, I attached some Cartwright Moonshine sequins and added some Wink of Stella clear pens on the butterflies for the finishing touch.  It’s super easy and simple but it looks like you took a while to make this card.  I do have a full tutorial on my Youtube Channel with more description of this 3 step stamping.  I hope you enjoyed this cad and please subscribe and follow for more inspirations and ideas.  Thank you, and Mahalo:)

Link to the video below

Instagram, Twitter, Tumbler, Twitter, Flickr, Bloglovin

@enjoyscrappin2

#enjoyscrappin2

FB: https://www.facebook.com/profile.php?id=100006270948703

For One Stop Shopping and Super Fast Shipping

http://www.tupelodesignsllc.com

OSA Red/Gold/Black Swap Card

OSA Swap

Aloha Guys!

Today I’m sharing a card I made for the Oriental Stamp Art Yahoo Group’s Red/Gold/Black Swap.  I made this card ending of February, I think but I didn’t want to post it right away because I wanted my Swap partner to receive their card first.  Oriental Stamp Art aka OSA is a yahoo group that enjoy Asian art.  It is a closed group but if you ask to join. they’ll be more than happy to have you on board.  They are all so sweet:)  The theme for this card was Red/Gold/Black, which meant those were the Only 3 colors we can use.  It was a bit challenging since we couldn’t use any white card stock, which is a staple in card making.  So I decided to make a Simple card.  The stamp sets I used here are from http://www.artneko.com and they carry a variety of Asian stamps.  They have really great quality of Red rubber stamps with both clung form and bare rubber, which is a little cheaper.  I have quite a good collection from them:)

For my card, I decided to use this older Basic Gray design paper which I bought a while back when I was in LA and it was one of those Sale paper’s that came in a 25 pack of 12×12.  I bought it because it reminded me of an Asian paper and I used this quite often when I’m making an Asian themed card.  Since I can only use the 3 colors, this design paper was perfect with the black and the red.  I also cut 2 pieces of black card stock using the Lawn Fawn’s stitched rectangle die in the Largest and the second largest die.  The large black panel will cover up my entire  front panel of my card and I’ll put the design paper in between the 2 black pieces i cut.  With my smaller piece of the black card stock I stamped out the tree and the sentiment using versa mark and used the Ranger’s Enchanted Gold embossing powder to emboss it gold.  It gives a super sparkly look against the black and I added some punched out gold card stock pieces to add some finishing touches.  I hope my swap partner likes this card.  I had a lot of fun participating in this swap and I’m sure I’ll be participating in more of their challenges and swaps.  I hope you enjoyed this card and I do have a full tutorial on how I made this card on my Youtube Channel if you’re interested.  Thank you so much for stopping by and Please subscribe and follow for more inspirations and ideas.  Thanks so much, Mahalo

Instagram, Twitter, Tumbler, Flickr, Bloglovin

@enjoyscrappin2

#enjoyscrappin2

http://www.artneko.com

For One Stop Shopping and Super Fast Shipping, visit

http://www.tupelodesigns.com

For Whimsical and Super Cute Digital/Stamps, visit

http://gerdasteinerdesigns.com

A

Gerda Steiner Designs Cute Easter Chick on Pile of Eggs on DIY wobble

Gerda Easter chick

IMG_7629

Aloha Guys!  Today I’m sharing with you this Super adorable Chick standing on this Pile of Easter eggs by Gerda Steiner Designs.  This Chick is so cute and I had a lot of fun working with this.  I put the Chick on a DIY Action Wobble and I have a tutorial on this which I made a while back.  I’ll put a link below if yo want to check that out.  This is a digital image and I printed this out 2x so that I can pop up the Chick on the wobble so it has movement.  I cut out this panel that I printed using the MFT Stitched Rectangle die and also cut out a black card stock with a larger die so I can have a mating for my Chick.  I colored this image using my Cpoic Markers and gave him a Basket full of Easter eggs that I stamped out with one of an older Stampin Up Collection.  It just happened to fit the size perfectly for my Chick. I also cut couple pieces of green card stock using the Lawn Fawn’s Grass border die and put it at the bottom for grass.  I also used My Hero Arts Tiny Flag die to make my own Design paper for my front panel as well.  I do have a full tutorial on how I made the card on my Youtube Channel if you’d like to check that out.  Before you know it, it’ll be Easter so why not start a little early so you won’t have to hurry at the last minute:)  I’ll be making some treat bags and Goodies for the teachers for my kids soon so stay tuned for those.  Thank you so much and I hope you like this card and please subscribe and follow for more inspirations and ideas.  I have the supply list below if you’re interested in the products I used today.  Thank you and Mahalo:)

Instagram, Twitter, Tumbler, Flickr, Bloglovin

@enjoyscrappin2

#enjoyscrappin2

Youtueb Video: http://youtu.be/VMg5hqdyA-o

DIY Action Wobbles: http://youtu.be/gBsNDjrPdRY

For Gerda Steiner Designs Stamps, Visit

http://gerdasteinerdesigns.com

For One Stop Shopping and Super Fast Shipping, Visit

http://www.tupelodesignsllc.com

Product Focus-Spectrum Noir Alcohol Markers

SN

IMG_7688IMG_7694

IMG_7696

IMG_7697


Aloha Guys!

Yesterday I posted a flower that I colored with my New Npectrum Noir Alcohol Markers.  Today, I’m sharing some more coloring using these markers.  I had several questions regarding skin tones and Hair colors.  I decide to make a Product Focus on these markers and kind of shared the differences form this Spectrum Noir vs. Copics.  I have a Full video on this Product Focus on my Blog.  Also, Tupelo Designs LLC is having a 10% off on all the Spectrum Markers as well as the Brand New Spectrum Noir Aquas.  So this is the perfect time to stock up on some markers.  These markers are Very reasonably priced and I really like these markers.  Thank you so much for visiting and please subscribe for more inspirations and ideas.  Thanks so much, Mahalo

Instagram,Twitter, Tumber, Flickr, Bloglovin

@enjoyscrappin2

#enjoyscrappin2

For One Stop Shopping and Super Fast Shipping,

http://www.tupelodesignsllc.com

My First Attempt with My New Spectrum Noir with Make it Crafty Image

IMG_7688

Aloha Guys!

Today I’m sharing a quick post while I’m playing around with my New Spectrum Noir Alcohol Markers and my New found Favorite Digi site, Make it Crafty. They carry both Digital and Rubber Stamps and I am in Love with their images. I purchased several images, and a lot more on my wish list, lol Look at this beautiful Rose!! My First attempt coloring with my New spectrum Noirs and trying to get use to the different tip, then I’m use to. I’ve had some questions regarding the SN and I will soon be doing a Product Focus on these markers. They are very Different than the Copics and there’s definitely a learning curve for me for me anyways, but these are really good markers.

IMG_7689

This is also an image I purchased from Make it Crafty, there was a set of 4 Beautiful flowers. I printed this on a kraft paper and used my Prismacolor pencils. I wanted this daisy to be white with a slight pink to it because I wanted to post it to their Color Challenge. Their color challenge was Kraft and Pink and I tried to add some pink to this daisy. I hope you guys enjoyed this quick post and please subscribe and follow for more inspirations and ideas. Thanks so much, Mahalo

Check out my Youtube Channel for How to Videos and More
https://www.youtube.com/channel/UCSmaap84Uvp7NPOcnJXGV9A
Instagram, Twitter, Tumbler, Flickr, Bloglovin
@enjoyscrappin2
#enjoyscrappin2

Gerda Steiner Designs New stamp Happy Spring

2015/02/img_7674.jpg

2015/02/img_7673.jpg

2015/02/img_7672.jpg

Aloha Guys!

Today I want to introduce to you a Brand New Stamp Set called Happy Spring which will be released on March 1! This is a really Great Quality Photopolymer stamp that has some spring elements which also can be used all year long. This is a builder stamp to create all shorts of scenery. There are many stamps that comes in this set, that I’m sure you’ll have tons of use for.
Today I created this simple card using the Bunny and the butterflies in the set. I stamped the bunny on top of some grass which is also available in this set and stamped 2 different type of butterflies all around the bunny. And since the bunny’s face is facing up in the air, I had to put s butterfly on his nose. Super cute!! I colored them using my Copic markers and attached all the pieces to my card base. I put clear wink is Stella on all the butterfly to give a sparkle that it needed. I do have a Full Tutorial on my YouTube on how I made this card as well as go over all the stamp set that’s included in this set so please check it out. Thank you so much for visiting and please subscribe for more inspirations and ideas. The supply list will be available on March 1 when the stamp set is released. Thank you so much and Mahalo

http://www.enjoyscrappin2.com
Instagram, Tumbler, Twitter, Flickr, Bloglovin
@enjoyscrappin2
#enjoyscrappin2
FB: Joyce Nakaoka

http://gerdasteinerdesigns.com