Gerda Steiner Designs Cute Easter Chick on Pile of Eggs on DIY wobble

Gerda Easter chick

IMG_7629

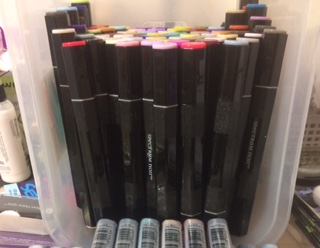
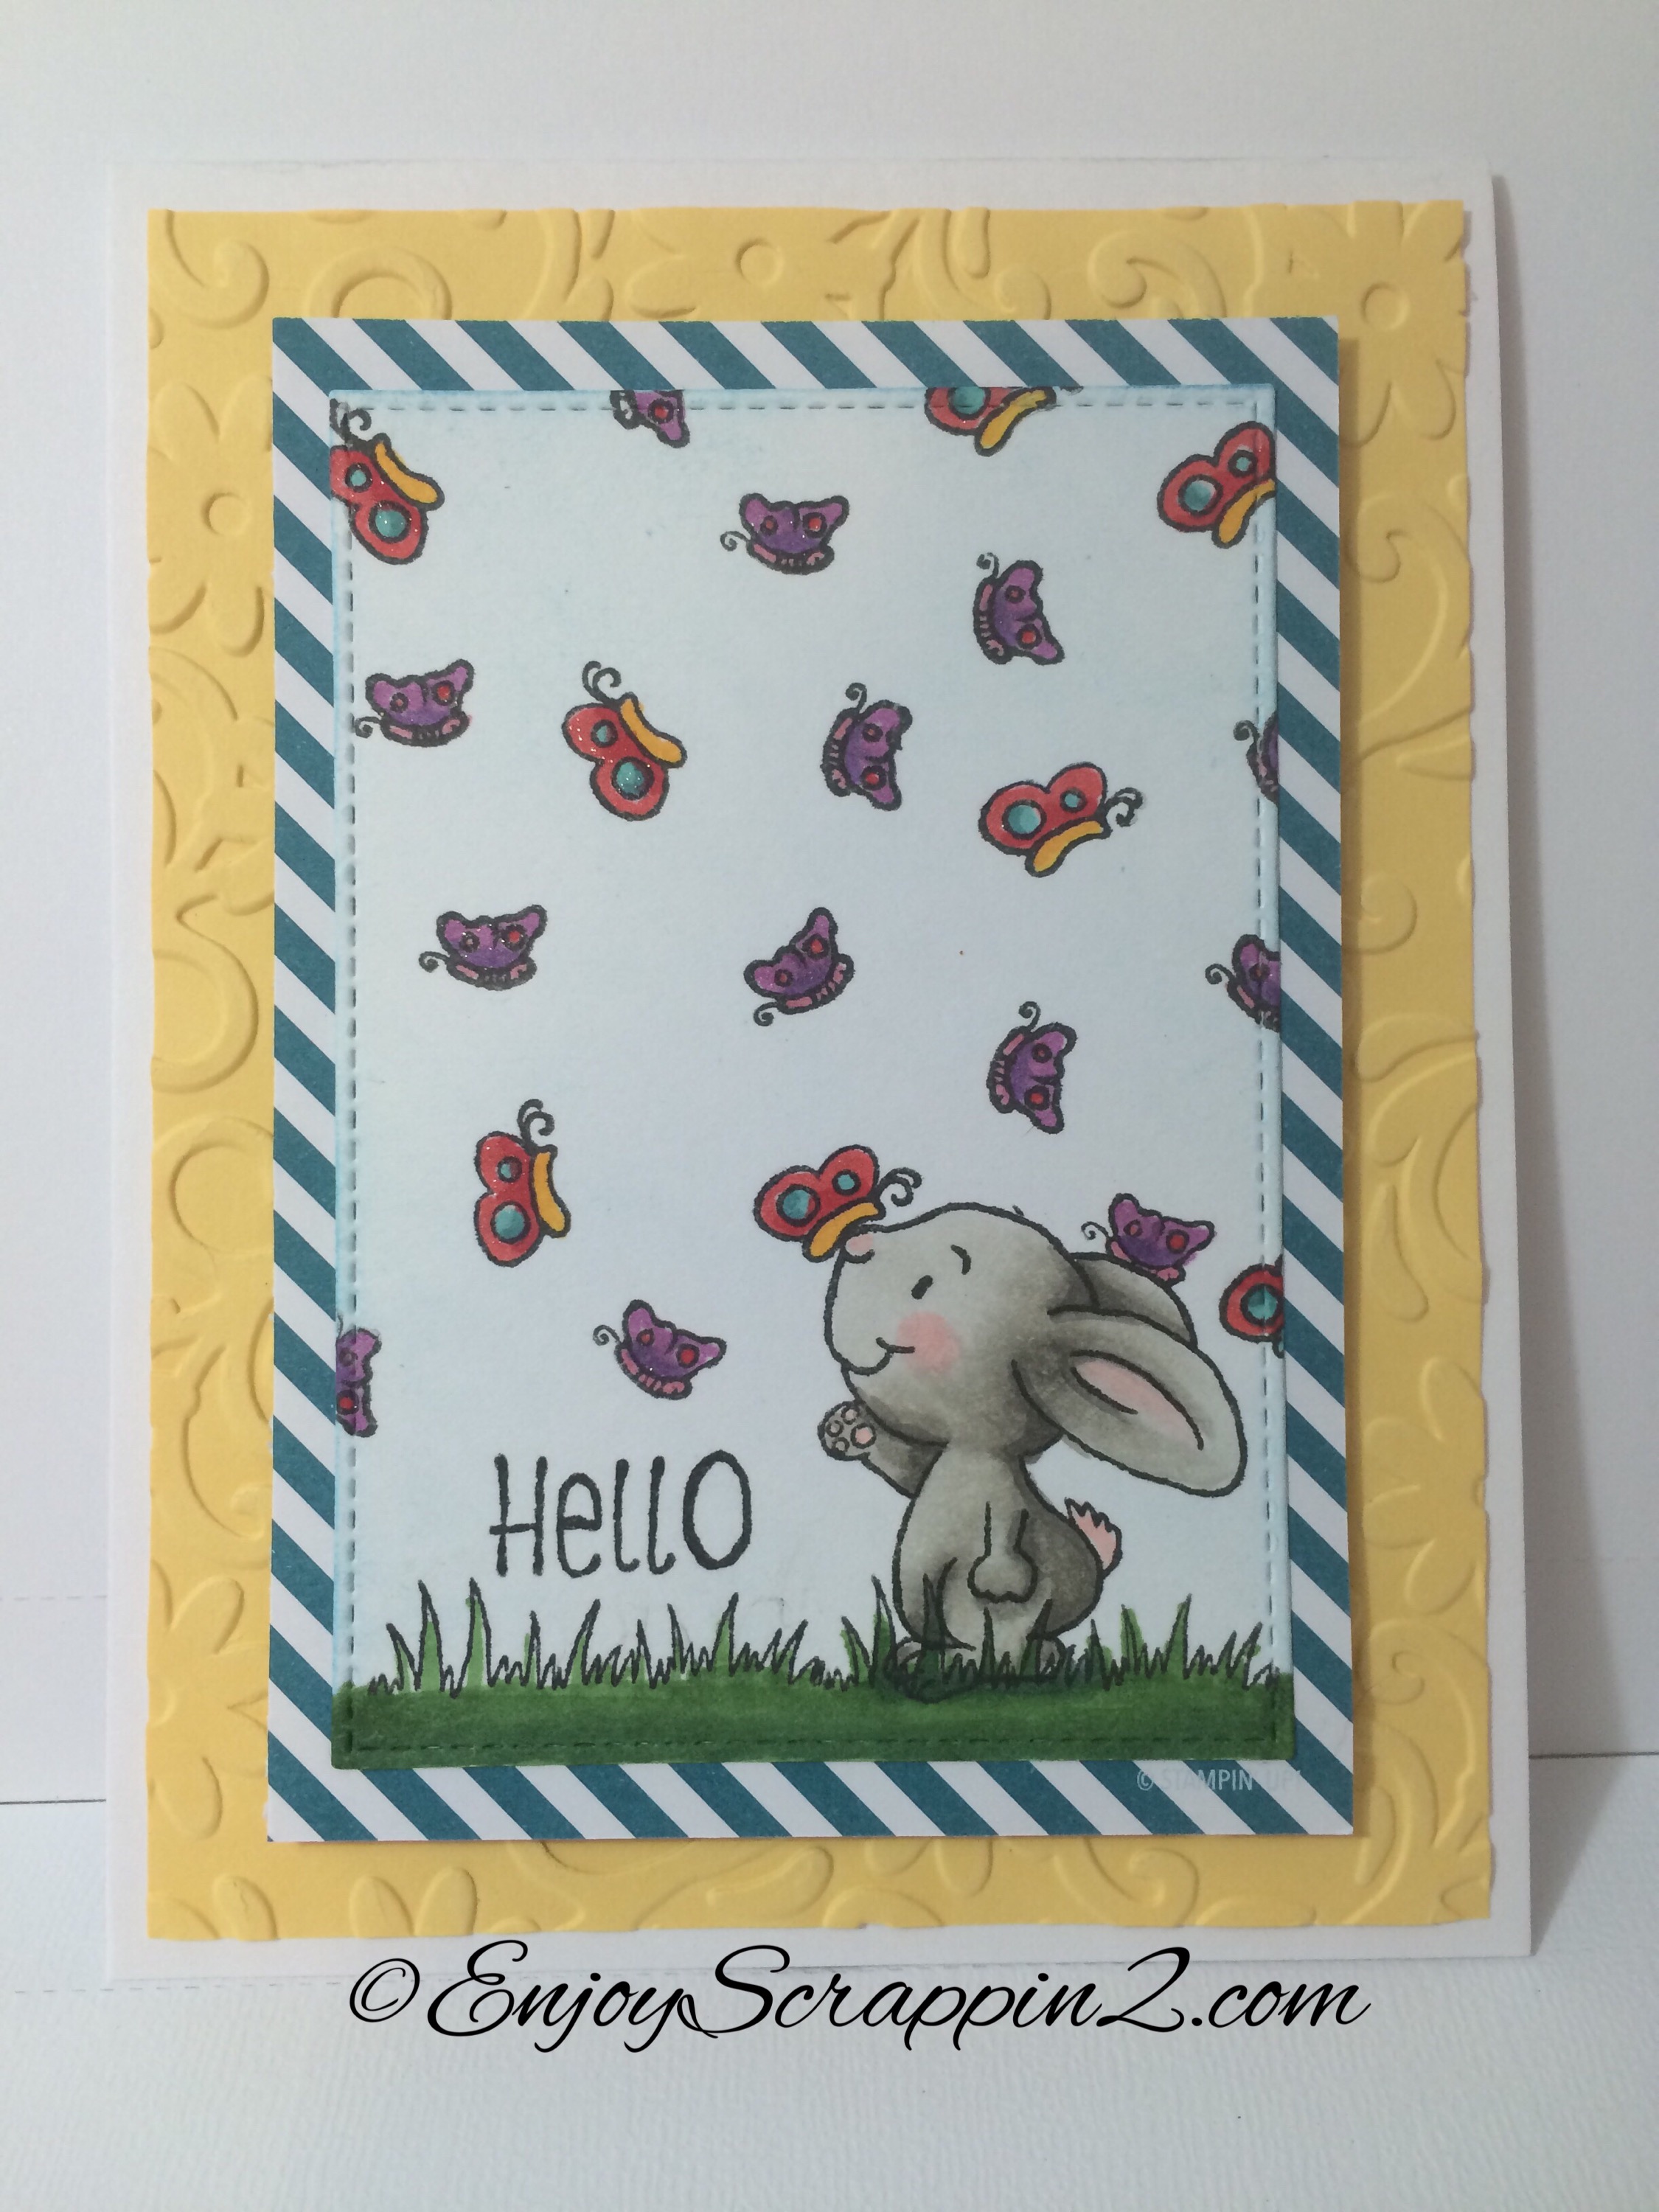
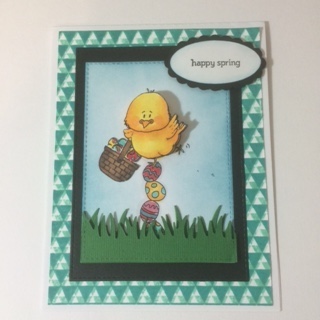
Aloha Guys!  Today I’m sharing with you this Super adorable Chick standing on this Pile of Easter eggs by Gerda Steiner Designs.  This Chick is so cute and I had a lot of fun working with this.  I put the Chick on a DIY Action Wobble and I have a tutorial on this which I made a while back.  I’ll put a link below if yo want to check that out.  This is a digital image and I printed this out 2x so that I can pop up the Chick on the wobble so it has movement.  I cut out this panel that I printed using the MFT Stitched Rectangle die and also cut out a black card stock with a larger die so I can have a mating for my Chick.  I colored this image using my Cpoic Markers and gave him a Basket full of Easter eggs that I stamped out with one of an older Stampin Up Collection.  It just happened to fit the size perfectly for my Chick. I also cut couple pieces of green card stock using the Lawn Fawn’s Grass border die and put it at the bottom for grass.  I also used My Hero Arts Tiny Flag die to make my own Design paper for my front panel as well.  I do have a full tutorial on how I made the card on my Youtube Channel if you’d like to check that out.  Before you know it, it’ll be Easter so why not start a little early so you won’t have to hurry at the last minute:)  I’ll be making some treat bags and Goodies for the teachers for my kids soon so stay tuned for those.  Thank you so much and I hope you like this card and please subscribe and follow for more inspirations and ideas.  I have the supply list below if you’re interested in the products I used today.  Thank you and Mahalo:)

Instagram, Twitter, Tumbler, Flickr, Bloglovin

@enjoyscrappin2

#enjoyscrappin2

Youtueb Video: http://youtu.be/VMg5hqdyA-o

DIY Action Wobbles: http://youtu.be/gBsNDjrPdRY

For Gerda Steiner Designs Stamps, Visit

http://gerdasteinerdesigns.com

For One Stop Shopping and Super Fast Shipping, Visit

http://www.tupelodesignsllc.com

Product Focus-Spectrum Noir Alcohol Markers

SN

IMG_7688IMG_7694

IMG_7696

IMG_7697


Aloha Guys!

Yesterday I posted a flower that I colored with my New Npectrum Noir Alcohol Markers.  Today, I’m sharing some more coloring using these markers.  I had several questions regarding skin tones and Hair colors.  I decide to make a Product Focus on these markers and kind of shared the differences form this Spectrum Noir vs. Copics.  I have a Full video on this Product Focus on my Blog.  Also, Tupelo Designs LLC is having a 10% off on all the Spectrum Markers as well as the Brand New Spectrum Noir Aquas.  So this is the perfect time to stock up on some markers.  These markers are Very reasonably priced and I really like these markers.  Thank you so much for visiting and please subscribe for more inspirations and ideas.  Thanks so much, Mahalo

Instagram,Twitter, Tumber, Flickr, Bloglovin

@enjoyscrappin2

#enjoyscrappin2

For One Stop Shopping and Super Fast Shipping,

http://www.tupelodesignsllc.com

My First Attempt with My New Spectrum Noir with Make it Crafty Image

IMG_7688

Aloha Guys!

Today I’m sharing a quick post while I’m playing around with my New Spectrum Noir Alcohol Markers and my New found Favorite Digi site, Make it Crafty. They carry both Digital and Rubber Stamps and I am in Love with their images. I purchased several images, and a lot more on my wish list, lol Look at this beautiful Rose!! My First attempt coloring with my New spectrum Noirs and trying to get use to the different tip, then I’m use to. I’ve had some questions regarding the SN and I will soon be doing a Product Focus on these markers. They are very Different than the Copics and there’s definitely a learning curve for me for me anyways, but these are really good markers.

IMG_7689

This is also an image I purchased from Make it Crafty, there was a set of 4 Beautiful flowers. I printed this on a kraft paper and used my Prismacolor pencils. I wanted this daisy to be white with a slight pink to it because I wanted to post it to their Color Challenge. Their color challenge was Kraft and Pink and I tried to add some pink to this daisy. I hope you guys enjoyed this quick post and please subscribe and follow for more inspirations and ideas. Thanks so much, Mahalo

Check out my Youtube Channel for How to Videos and More
https://www.youtube.com/channel/UCSmaap84Uvp7NPOcnJXGV9A
Instagram, Twitter, Tumbler, Flickr, Bloglovin
@enjoyscrappin2
#enjoyscrappin2

Gerda Steiner Designs New stamp Happy Spring

2015/02/img_7674.jpg

2015/02/img_7673.jpg

2015/02/img_7672.jpg

Aloha Guys!

Today I want to introduce to you a Brand New Stamp Set called Happy Spring which will be released on March 1! This is a really Great Quality Photopolymer stamp that has some spring elements which also can be used all year long. This is a builder stamp to create all shorts of scenery. There are many stamps that comes in this set, that I’m sure you’ll have tons of use for.
Today I created this simple card using the Bunny and the butterflies in the set. I stamped the bunny on top of some grass which is also available in this set and stamped 2 different type of butterflies all around the bunny. And since the bunny’s face is facing up in the air, I had to put s butterfly on his nose. Super cute!! I colored them using my Copic markers and attached all the pieces to my card base. I put clear wink is Stella on all the butterfly to give a sparkle that it needed. I do have a Full Tutorial on my YouTube on how I made this card as well as go over all the stamp set that’s included in this set so please check it out. Thank you so much for visiting and please subscribe for more inspirations and ideas. The supply list will be available on March 1 when the stamp set is released. Thank you so much and Mahalo

http://www.enjoyscrappin2.com
Instagram, Tumbler, Twitter, Flickr, Bloglovin
@enjoyscrappin2
#enjoyscrappin2
FB: Joyce Nakaoka

http://gerdasteinerdesigns.com

Balloon Shaker Card using Gerda Steiner Designs 3 Monsters

2015/02/img_7568.jpg

2015/02/img_7569.jpg

Aloha Guy!

Today I want to share this Balloon shaped card that’s also a Shaker card. I haven’t made a shaped card in a while so this was kind of fun. On top of that, I absolutely Love these Monster!!! This is a Digital image and the set has All 3 Monsters, I’ll leave a link below if you want to check it our.  First I made my Balloon Card base using Simon Says Stamp’s Balloon Die.  This die set has multiple sets of Balloons in it so the set is very versatile.  I then cut another balloon using the same size as my base for my card front, using watercolor paper.  I used that piece and cut out 3 circles using the SSS In Stitches circle die.  This has stitching on both the negative and the positive side so my circles that I cut has stitching on it, which is pretty cool.  I also used the same dies to cut myself an Acetate and some foam which I’ll use for the shaker portion.

I printed All 3 Monsters onto a Neenah Solar White paper and I couldn’t decide which one to use so I decided to used all 3.  I colored the monsters using my Copic markers.  I used the Inktense Pencils on the watercolor paper to add some color to the Balloon panel.  I used 3 different colors for the 3 circles and then used a brush and water to liquify the colors.  I tried to match the hole to the color of the monsters.  I then used the Peacock Feathers on the rest of the balloon. I attached the acetate to the front balloon and attached the foam.  In the circles I added some small seed beads, I didn’t add to much because I didn’t want to cover up the monsters.  I added some bakers twine bow at the knot of the balloon, and put a Happy Birthday sentiment.  I do have a Full Tutorial on how I made this card on my Youtube Channel, if you’d like to check that out.  Thank you so much for watching and Please subscribe for more inspirations and ideas.  Thanks again, Mahalo

http://www.enjoyscrappin2.com
https://www.youtube.com/channel/UCSmaap84Uvp7NPOcnJXGV9A
Instagram, Twitter, Tumbler, Flickr, Bloglovin
@enjoyscrappin2
#enjoyscrappin2
FB: http://www.facebook.com/profile.php?id=100006270948703

http://gerdasteinerdesigns.com

Gerda Steiner Designs-Late but with Love

2015/02/img_7617.jpg

Aloha Guys!

Today I’m sharing another card I made using Gerda Steiner Designs New Clear stamp set Late but with Love.  I really rally enjoy this stamp set because there’s so many different ways to use this stamp.  The versatilities are endless.  I Stamped out the images using Momento Tuxedo Black ink and colored all the images using my Copic Markers.  I cut out some brown card stock with the Lawn Fawn’s Tree border die and also cut my favorite green card stock with the Lawn Fawn’s stitched hillside border die.  I also embossed a white card stock using the Stampin Up’s clouds embossing folder (Retired) and distressed it with Peacock feather distress ink pad to bring out the embossed clouds.  I put all the components together and put glossy accents not the balloons for some finishing touch.  I do have a Full tutorial on how I made this card on my Youtube Channel if you’d like to check them out.  Thank you so much for visiting and please subscribe for more inspirations and ideas.  I’ll leave a link below for this stamp set and also the supplies I used of this card.  Thank you, Mahalo:)

http://youtu.be/LAxOmFaqBgY

https://www.youtube.com/channel/UCSmaap84Uvp7NPOcnJXGV9A
Instagram, Twitter, Tumbler, Flickr, Bloglovin
@enjoyscrappin2
#enjoyscrappin2
FB: http://www.facebook.com/profile.php?id=100006270948703

For More Adorable Digital, Rubber and Clear Stamps, please check out

http://gerdasteinerdesigns.com

For One Stop Shopping and Fast Shipping, please check out 

http://www.tupelodesignsllc.com

Happy Valentine’s Day with Mo’s Digital Pencil

2015/02/img_7581.jpg Aloha Guys!

Happy Valentine’s Day!!! Today I want to share with you guys this simple card I made using this Adorable image from Mo’s Digital Pencil’s image. This is a digital image from http://www.mosdigitalpencil.com. This image is only $1 for today and today only so go ahead and check this out if you’re interested in purchasing this image, I’ll leave a link below. After today, it’ll still be available but for a full price. I’ve always loved Mo’s images because they are super cute and this image kind of reminds me of my daughter:). Today I’m doing some quick coloring using my Copic Markers. I’ll list the full list of colors I used below along with the supply list.

I printed her out on Neenah Solar White Classic Crest card stock and cut her out using MFT’s Stitched rectangle die.  I used the largest size and I also cut out another card stock using the Mama Elephant’s Femme Frame die.  I’m also using the same patterned paper I had left over from making the Valentine’s goodie bag.  I have a Full tutorial on how I made this card on my Youtube Chanel if you’d like to check that out.  I thank you so much for visiting and please subscribe for more inspirations and ideas.  Have a Great Valentines Day:) Mahalo!

Skin: E21, E00, E000, R20 for blush

Hair: E55, E53, E51

Chocolate Heart: E59, E57, E55

http://www.enjoyscrappin2.com https://www.youtube.com/channel/UCSmaap84Uvp7NPOcnJXGInstagram, Twitter, Tumbler, Flickr, Bloglovin @enjoyscrappin2 #enjoyscrappin2 FB: Joyce Nakaoka

http://www.tupelodesignsllc.com

Gerda Steiner Designs New Collection-Late but with Love

2015/02/img_7539.jpg

2015/02/img_7540.jpg

Aloha Guys!

Today I’m very exited to share with you this Clear Stamp Collection from Gerda Steiner Designs.  As you guys know, I am on the Design Team for Gerda Steiner Designs but I was using her stamps way before being on the DT because I love her stamp collections.  With that being said, she released her very First Clear stamp set.  She has both digital and rubber stamps available on her site which I’ll put a link below.  These Photopolymer stamps are very high quality because I used a lot of different ink to stamp these out to see how well it stamps.  It stamped really clear and crisp.  Without further due, I’ll talk about this card I made using this stamp set.  I stamped out the snail and the envelope in Momento tuxedo black ink so that I can use my Copic markers to color them.  I have a piece of white card stock which I embossed using Stampin Up’s retired cloud embossing folder.  I distressed the edges for the sky portion using both broken china and peacock feathers.  I also cut some vellum using Mama elephants’ Trio die to use for my clouds and cut some actual clouds using Lawn Fawn’s Blue skies cloud die. I stamped out a hill of envelopes using Tim Holtz distress inks and used water to liquify the envelopes.  I also embossed the sentiment “Late but with Love” using Rangers’ Liquid Platinum.  For a Full Tutorial on how i made this card, Please check out my Youtube Channel.  Also, Please press the like button and Subscribe for more inspirations and ideas.  Much Mahalo:)

http://www.enjoyscrappin2.com
https://www.youtube.com/channel/UCSmaap84Uvp7NPOcnJXGV9A
Instagram, Twitter, Tumbler, Flickr, Bloglovin
@enjoyscrappin2
#enjoyscrappin2
FB: Joyce Nakaoka

Valentine Lollipop Holder-Gerda Steiner Design and Stampin Up

2015/01/img_7543.jpg

Aloha Guys!

Today I’m sharing this Valentine Lollipop Holder using the Gerda Steiner Designs Cat in Heart Digital image and Stampin Up’s Tag Punch.  I’m making these treats for my Kids school friends and this is very simple to mass produce.  I printed all the images out and I colored all of them using the Alcohol markers.  I made some different than others to give more interest to the design.  I used the Stampin Up’s Scalloped tag punch and punched both ends of the tag measuring 2″x6″ of I can get more out of a 12″x12″ paper.  I need to make about 80 of these so I really wanted to simplify things.  I put the lollipop through the front hole and attached a ribbon and made a bow.  I also cut a little tag using a retired Jewelry tag punch and wrote my daughter’s name on it.  I then used a jump ring to attache the tag through the ribbon.  This finishes off the treat and Now i can pass them out when it’s Valentines Day.  I hope you like this little project and I do have a Full step by step video tutorial on how I made this on my youtube Channel.  Thank you so much for visiting and please subscribe for more inspirations and ideas.  Much Mahalo:)

http://www.enjoyscrappin2.com

http://youtu.be/FtJeF7ubDxw

GYouTube:
http://www.youtube.com/channel/UCSmaap84Uvp7NPOcnJXGV9A
Instagram, Twitter, Tumbler, Flickr, Bloglovin
@enjoyscrappin2
#enjoyscrappin2
FB: Joyce Nakaoka

Inky Paws Challenge and SSS Wednesday Challenge in One

p.txtwednesdayblog-logo2015/01/img_7526.jpg

2015/01/img_7525.jpg

Aloha Guys!

Today I made a card for Both The SSS Wednesday Challenge Have a Heart and the Inky Paws Challenge, Use a Heart in One.  I’m using the Flirty Flamingo set which I colored using my Copic Markers.  I created the Background of the Flamingoes using the Stampin Up’s New stamp with my watercolored crayons to give a very subtle impression.  I then stamped a small heart from one of the Lawn Fawn’s heart using the Simon Says Stamp School house red ink pad to create a heart tree.  On the front panel of the card, I used a SSS Heart Background stamp using my crayons again to give a subtle look.  I created this shaker card using fun foam’s instead of using the dimentionals.  I had bunch of them left over from my Christmas Shaker ornament so I decided to use them up.  I also embossed a bright pink card stock using a cuttle bug embossing folder.  I attached everything together and finished off this card.  I will have a video on my youtube channel later on this week on how I made this card.  Thank you so much for visiting and Please subscribe for more inspirations and ideas.  Much Mahalo!

http://www.enjoyscrappin2.com YouTube: http://www.youtube.com/channel/UCSmaap84Uvp7NPOcnJXGV9A Instagram, Twitter, Tumbler, Flickr, Bloglovin @enjoyscrappin2 #enjoyscrappin2 FB: Joyce Nakaoka