Quick Look at Altenew Crisp Dye Ink Pads-Tupelo Designs LLC

FullSizeRender 3

IMG_8719

IMG_8718

IMG_8717

Aloha Guys!

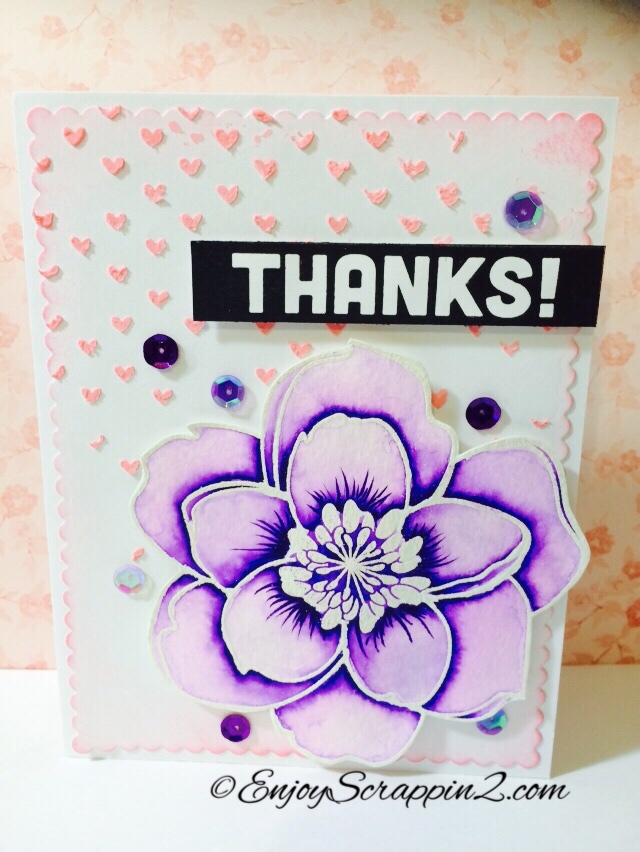
Today I made this card, using the Altenew Crisp Dye Ink Pads.  I want to give you a Quick overview on these ink pads and what I think of them.  There are so many Ink pads to choose from now since many company’s are making their own ink pads, so it can get overwhelming.  I’m really  glad that Altenew came out with their Full size pads as well as the Mini Ink Pads.  Since I like to collect ink pads I am running out of room, so these Mini ink pads are perfect for me.  I like the fact that I have these options to choose from.  These Mini ink pad comes in a set of 4 and these 4 are basically in the same color family.  As of now, they have 3 Collections totaling all 12 of their ink pads and Jet Black is included in the 12 colors.  I made a color chart which you can see in these pictures below

FullSizeRender 12

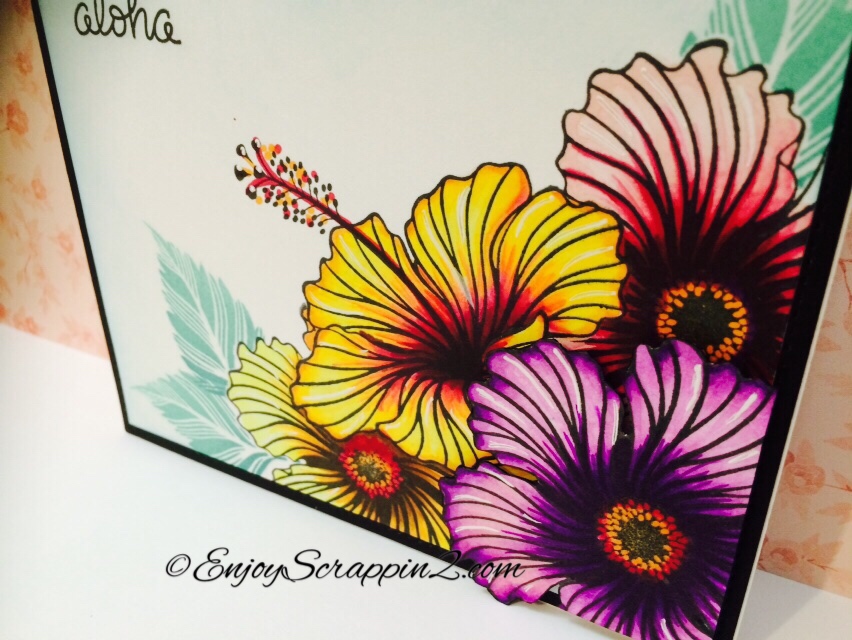
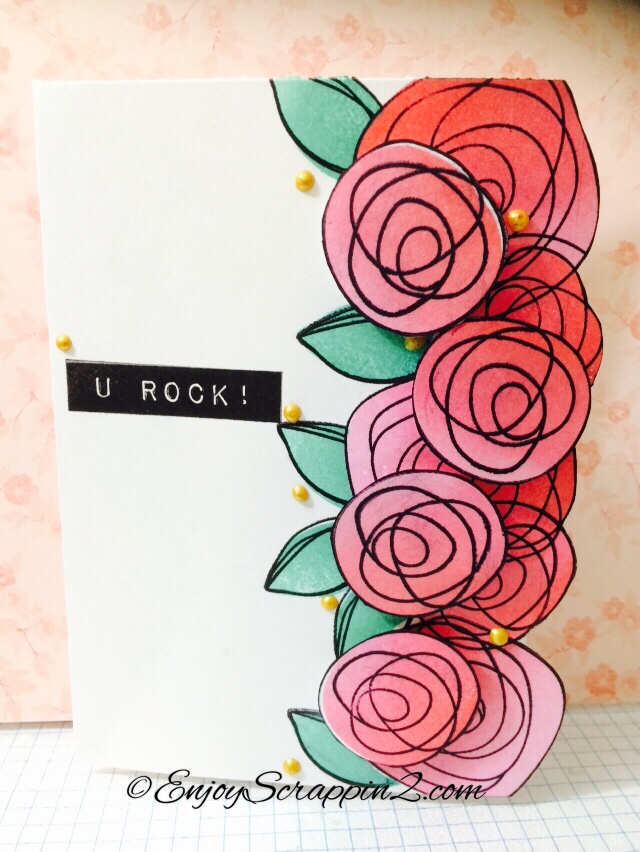
I have a Video link above if you want to see them being used.  I like the fact that these mini ink pads covers closes the pad tightly, which will prevent from the inks being dried out.  I personally Love this feature.  These are Dye based inks and they stamp very Crisp, without having to wait for the ink to settle in the paper.  You can mix and match these colors to create multiple looks and making it easy to layer on the colors.

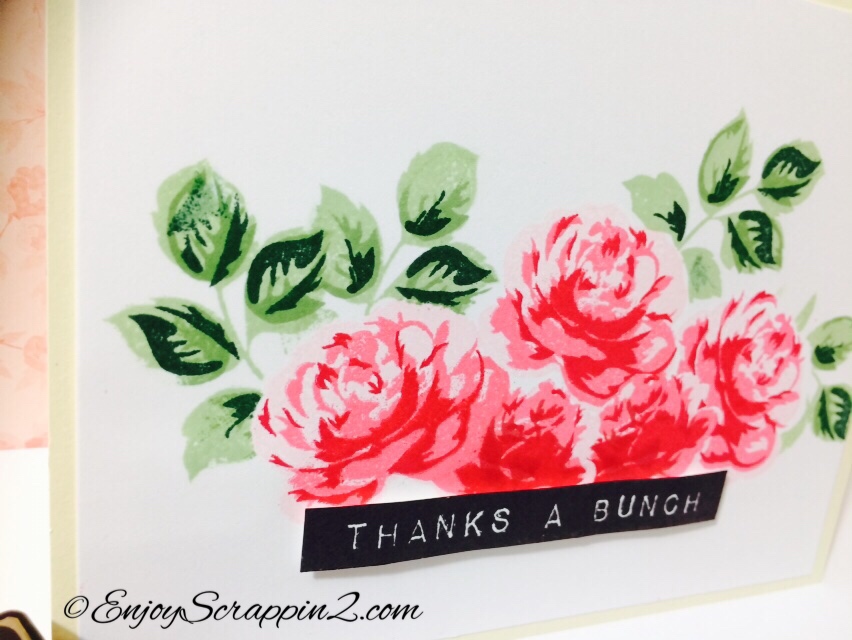
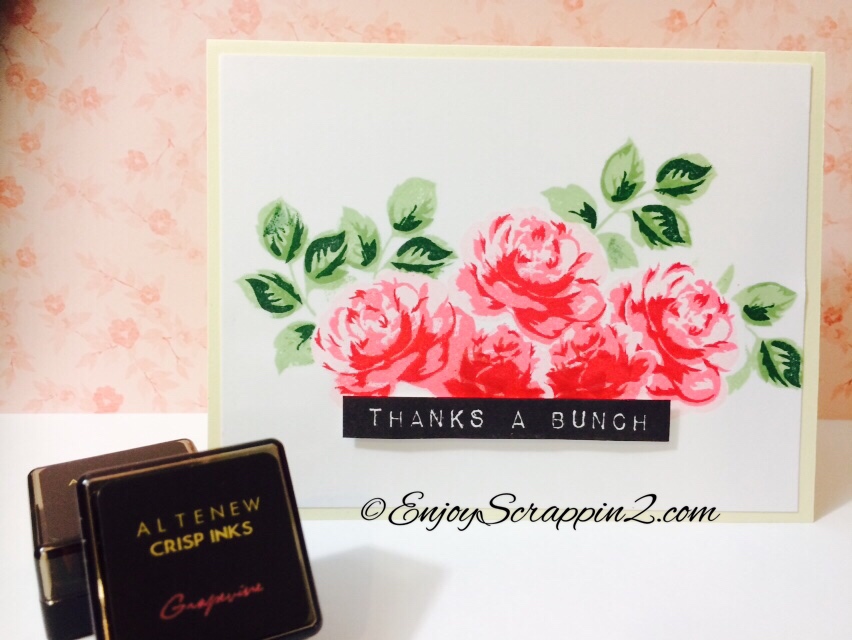
Today I decided to use the pink to red tone to create the card above along with the Vintage Roses stamp set, which are meant to layer on top of each other.  Please go ahead and watch the video if you want to see these inks in action.  I thank you guys so much for stopping by, and all the supplies I used will be linked in the description below as always.  Please subscribe and follow for  more inspirations and ideas.  Thanks so much 🙂

Follow me on Social Media

Links located in the Left column

http://www.tupelodesignsllc.com

Gerda Steiner Designs Blog Hop-Inroducing How Are Ewe? Stamp Set

Gerda Blog Hop

IMG_8706

IMG_8707

IMG_8708


IMG_8721

Aloha Guys!!

Today I’m Super Excited to be part of Gerda Steiner Designs Blog Hop with some Fantastic Designers to Celebrate the New Release of “How Are Ewe” Stamp set.  Blog hop will start today on July 10th at 9:00 am PST and it’ll end on July 12th at 6:00 pm PST.  To celebrate the Blog Hop, Gerda is giving away 3 stamps sets to 3 Lucky Winners.  3 Winners will be randomly chosen from comments along the Hop, so be sure to leave a comment for your chance to wing his Fabulous stamp set.  The winners will be announced on July 13th on Gerda Steiner Designs website!!  So good luck to you all 🙂

For my card today, I stamped and cut 3 of the small sheep and colored them using my Shinhantouch Brush markers, which are alcohol markers.  I have a Black card stock cut to 4″x5 1/4″ and I also cut a watercolor card stock using MFT’s Stitched rectangle die.  I want to create a night scenery for my sheeps so I decided to use some mini distress inks.  The colors I chose are Seedless preserves, Salty Ocean, and Chipped sapphire.  I also added some black soot at the end to darken up the edges more.  I used a mini ink blending tool and blended the 3 different colors.  I stamped out the sentiment Sweet!  on the top left corner and also added some stars, which is also included in this set.  To finish up my background, I added the Judikins Black diamond embossing powder to just the top of my panel I created to give some shine.  I cut some grass out of some iridescent green card stock using lawn fawns grass border die.  I stamped out a gate and cut only one on some wood grain pattern paper.  I attached everything together to make it look like the sheeps are jumping over the gate.  I have a Full step by step video up above if you’re interested.  I hope you liked this card and the Next Hop is to our very talented designer Madey Lim.  I’ll leave the links below.  I hope you guys enjoy this Hop and don’t forget to comment for your chance to win this stamp set.  Thank you so much for stopping by 😀 For full detail for this Blog Hop is listed below.  Good luck to you all!!

http://www.gerdasteinerdesigns.com/

Below you’ll find the Blog Hop Details:
Clearstamp Set: How are EWE?
Start: Friday July 10th 2015 at 9am PST.
End: Sunday July 12th 2015 at 6pm PST
To celebrate the Blog Hop GSD is giving away 3 of the new released stamp set!!!
The winners will be randomly chosen from all the comments of the blogs mentioned below!
The 3 winners will be announced on http://www.gerdasteinerdesigns.com on July 13th!
Official Release Date of the How are EWE Set is Tuesday July 14th.

Hop Order:
Start: http://www.gerdasteinerdesigns.com
Wiebke Zander http://buntebastelecke.blogspot.de/
Karen Oliver http://moreplease-ko.blogspot.com/
Jess Gerstner – http://www.jesscrafts.com/
Julia Altermann http://just-one-more-card.com/
Joyce Nakaoka https://enjoyscrappin2.com/   (You are Here)
Madey Lim http://madeylim.blogspot.com/
Chitra Menon http://craftingchitra.blogspot.com/

TTCRD May-June 2015 Magazine is Now Available

Cover

Aloha Guys!

The July-August edition of Through the Craft Room Door Magazine is in the Subscribers Only area for your viewing pleasure.

We have some amazing Tutorials and Articles for you to enjoy.

3 videos for your viewing pleasure and several Studio files for some fun Summer cards.

Learn how to make popsicle stick bracelets in our Kids Korner. Check out our 101 Tutorial on how to use those fun Gelatos and see how a water bottle is transformed into a work of art that is both lovely and useful as a pencil holder.

Come play along in our Christmas in July Challenge and adventure to several blogs on a mini treasure hunt.

Our Featured Digi Artist is Deedee Anderson, the artist and owner of Deedee’s Digis!

She has provided us with 3 awesome sets of images as well as inspiration from her team using the images!

As usual, we have awesome inspiration for the summer and Christmas!

So grab that glass of something refreshing, kick back and enjoy!

If you do not currently subscribe to the magazine you will need to go to the top of the page on the website and click on the Subscription/Renewals tab.

Happy Crafting!

http://craftrmdoor.ning.com

Gerda Steiner Designs Nerdy Kitten with Prismacolor Pencils

IMG_8686

IMG_8687

Aloha Guys!

Today I’m making a card for Gerda Steiner Designs and I’m using this super adorable digital image called Nerdy Kitten.  Super cute, I just love his glasses and his sweet face.  I printed him out on Neenah Solar White 80lb paper and cut it using the Simon Says Stamp In stitches circle die.  I’m coloring this image with my Prismacolor pencils, which I haven’t used in a while.  I colored the image with the pencils and blended it using Gamsol. If you didn’t know, Gamsol is a solvent that will break down the colors to smooth it out.  I have a full tutorial up above on how I made this card.  I hope you enjoyed this card and I thank you very much for stopping by, I always appreciate it.  All the supplies I used will be linked below if you’re interested.  Thanks again 🙂

Follow me on my Social Media

Click on the links on the left side of my blog , which will direct you to my social medias.

Essentials by Ellen Magnolia and Zig Clean color markers

IMG_8589

IMG_8591

IMG_8590

Aloha Guys!

Today I’m posting this card I made using the Magnolia set from Essentials by Ellen, Ellenhutsonllc.  Recently I picked up this stamp set and couple others from the Essentials line, I colored this using the Zig clean color markers.  I do have a video on how I colored this image up above if you’re interested but I put together this card off camera.  I only used 2 purples to color this and I embossed the flower with white embossing powder before I started the coloring process.  After coloring, I fussy cut the flower out and attached it to the background panel, which was created with Embossing paste and SSS falling hearts stencil.  The sentiment is also from SSS, which I stamped it out using SSS black ink pad and fussy cut them out.  Added some sequins and made this simple card.  I really enjoyed coloring this Magnolia, I love the size of this flower and I had a lot of fun coloring it 🙂  I’ll put all the links below for all the supplies I used on this card.  I thank you guys so much for stopping by and please subscribe and follow for more inspirations and ideas.  Thanks so much

Follow me on Instagram, Twitter, Tumblr, Flickr, Bloglovin

Links will be located on the left side of my Blog

Coloring Hibiscus with Spectrum Noirs and Some Tips-Tupelo Designs LLC

IMG_8641

IMG_8643

IMG_8642


Aloha Guys!

Today I’m making a DT card for Tupelo Designs LLC using the Hibiscus stamp set from Designs by Ryn.  I’ll be using Spectrum Noir alcohol markers and I’ll quickly go over some tips on using your bare rubber stamps without mounting it on Cling foam.  If you are interested in mounting your stamps on the cling foam, I’ll leave a link below where Jane shows the entire process.

These stamps Designs by Ryn are such a high quality red rubber stamps.  They are very deeply etched and detailed, so you won’t have any issues with getting a good crisp image.  I personally like to use a Rock-A-Block when I’m stamping bare rubber stamps.  That’s just my preference and you can play around with different types of block.  There’s a slight learning curve to it but once you get use to them, they are great.

I’ll be coloring most of my flowers off camera but I will share several petals and go over some things.  These flowers took over and hour to color, and I don’t think you want to watch me color for an hour.  You can go ahead and check out the video above for the whole process as well as some tips for using your bare rubber stamps.

I’m trying out couple different tools that I’ve never used before. I show it very briefly since the video was fast forwarded 4x.  One is the Blending tool that Mike, owner of Tupelo Designs LLC actually makes, and the other being the Teflon Bone Folder.  I’ll share more footage of using this tool in another video but I just gotta say, they are fantastic tools.  The blending tool is perfectly shaped so I can grab it very easily and makes blending much easier.  I have wrist problems so this tool is perfect for my hands.  The other tool that i’m fascinated by is the Teflon Bone folder.  I’ve seen others use it, and it was highly recommended by tons of people and now I know the reason why.  They give a really crisp scor and when you burnish the fold, there is no shinny residue.  It also feels good in my hands as well.  I’m super excited about these New tools for me, I’ll share more about it later on.  I hope you like this card and tips I gave was useful.  Please subscribe and follow for more inspirations and ideas.  Thank you so much for stopping by and I’ll see you guys next time.

Instagram, Twitter, Tumblr, Flick, Bloglovin

@enjoyscrappin2

#enjoyscrappin2

How to mount red rubber stamps onto Cling mount

https://www.youtube.com/watch?v=1Gs0z8wfLl4


Gerda Steiner Designs Little Fairy Card

IMG_8630

IMG_8632

IMG_8631

Aloha Guys!

Today I’m making a card for Gerda Steiner Designs using this Little Fairy Digital image.  She is super cute so I just had to use her.  I printed her out on Neenah Solar 80lb card stock and fussy cut her out.  I’ll be coloring her using my Shinhantouch Brush Alcohol markers.  I pre-made the background using the Ken Oliver Color bursts and I’ll leave a link below where I demonstrate the color burst if you’re interested.  It’s a real fun item to play with.  After coloring the fairy, I sponged the rest of the background with Chipped Saphire distress ink and assembled everything together.  I do have a full tutorial on how I made this card up above if you want to take a look.  I hope you like this card and all the supplies I used will be linked below.  I want to thank you guys for stopping by and please subscribe and follow for more inspiration and ideas.  Mahalo

Follow me on Instagram, Twitter, Tumblr, Flickr, Bloglovin

@enjoyscrappin2

#enjoyscrappin2

Your Next Stamp’s Quirky Animal Set Five With Spectrum Noir

IMG_8625

IMG_8624

IMG_8623

Aloha Guys!

Today I’m super excited to play with this stamp from Your Next Stamp.  This stamp set is called Quirky Animal Set Five and it has this adorable dancing butterfly along with this sentiment that says “You make me do the Happy Dance!”  How cute is that.  I Love this sentiment so I wanted to use it with the butterfly.  These are actually my First set of stamps from them and they are super high quality photopolymer stamps and they have really unique whimsical designs.  I have one more set of stamps to share with you real soon, which is just as adorable as this one.  I had so much fun coloring the butterfly with Spectrum Noir Alcohol markers and I added some Music note die cut piece to embellish the card at the end.  I hope you like this card and you can see the entire process in the video link above.  I’ll leave all the links below for all the supplies I used on this card, if you want to check them out.  Thank you so much and I hope to see you guys next time.  Thanks again!

Follow me on Instagram, Twitter, Tumblr, Flickr, Bloglovin

@enjoyscrappin2

#enjoyscrappin2

http://yournextstamp.com

Through The Craft Room Door’s Anything goes Challenge for June 23-28

IMG_8517

IMG_8518

Aloha Guys!

Today I’m sharing with you this card I made for Through The Craft Room Door’s Anything goes challenge from June 23-28.  Anyone can Participate and I’ll leave the links below if you’re interested.  The sponsor for this Challenge is Drawn with Character and you’ll be able to win some Fabulous prizes so come play with us.  All the information regarding this card will be available on The through the craft room door’s website so we hope to see you there.  Thanks for stopping by.

Please Follow me on Instagram, Twitter, Flickr, Tumblr, Bloglovin

@enjoyscrappin2

#enjoyscrappin2

http://craftrmdoor.ning.com

Clean and Simple Card Using Ombre Inks Tupelo Designs LLC

IMG_8614

IMG_8615

IMG_8616

Aloha Guys!

Today I’m making a DT card for Tupelo Designs LLC and I’ll be using one of the New MFT stamps set I received in my DT Package.  I’ll also be using some Hero Arts Ombre inks for my flowers and if you have not played with these inks, you should definitely try, they are super fun.  The Ombre inks have 3 different shades that goes from light to dark all in one pad so as you can see on my video and from the pictures above, you can create a really fast card to create some unique looks.  I decided to use the Pink to red for my flowers, which gave the flowers some lighter shades as well as the dark all in just one stamping, which I thought was way cool.  I used the outlined image using the Hero Arts Black dye inks to give a distinct line for these flowers but you certainly can use a brighter red to give it more of a muted look.  I did the same for the leaves as well using the Mint to green ink pad.  You can see my Full process on how I made this card on the video up above.  I hope you like this card and video and please subscribe and follow for more inspirations and ideas.  I’ll leave all the supplies I used in this card in the information below.  I thank you guys so much for stopping by and I’ll see you guys next time.  Mahalo 🙂

Follow me on Instagram, Twitter, Tumblr, Flickr, Bloglovin,

@enjoyscrappin2

#enjoyscrappin2.com

http://www.tupelodesignsllc.com