Stampin Up-Snow Much Fun Christmas!

IMG_7144-5.JPG

IMG_7146-5.JPG

Aloha Guys!

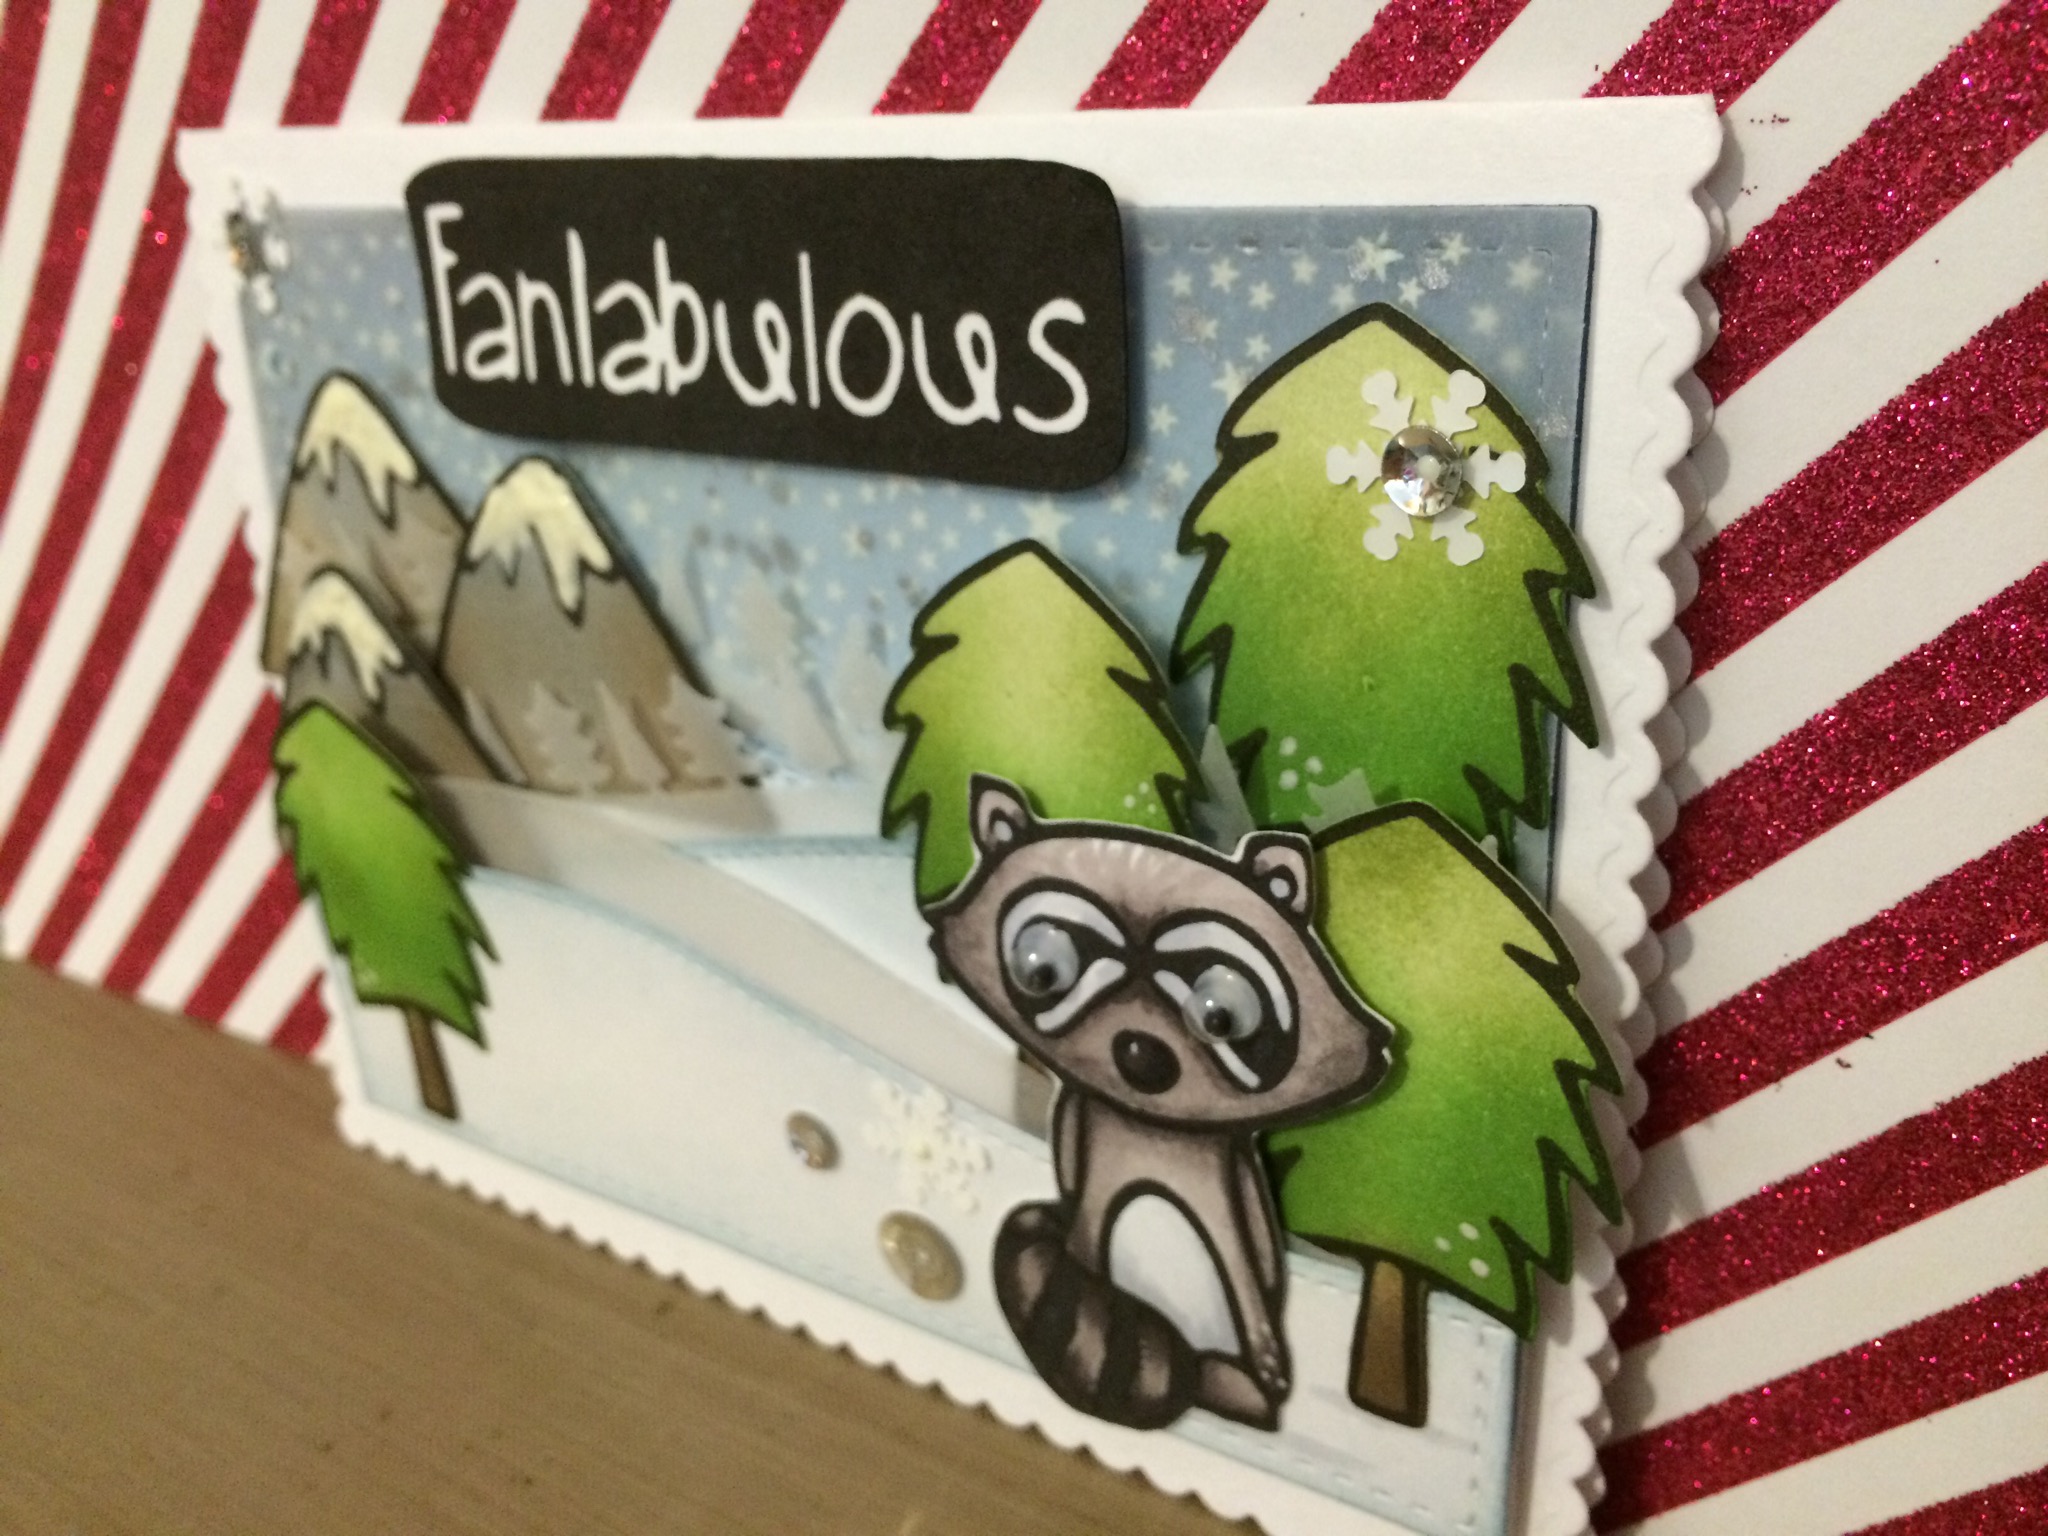
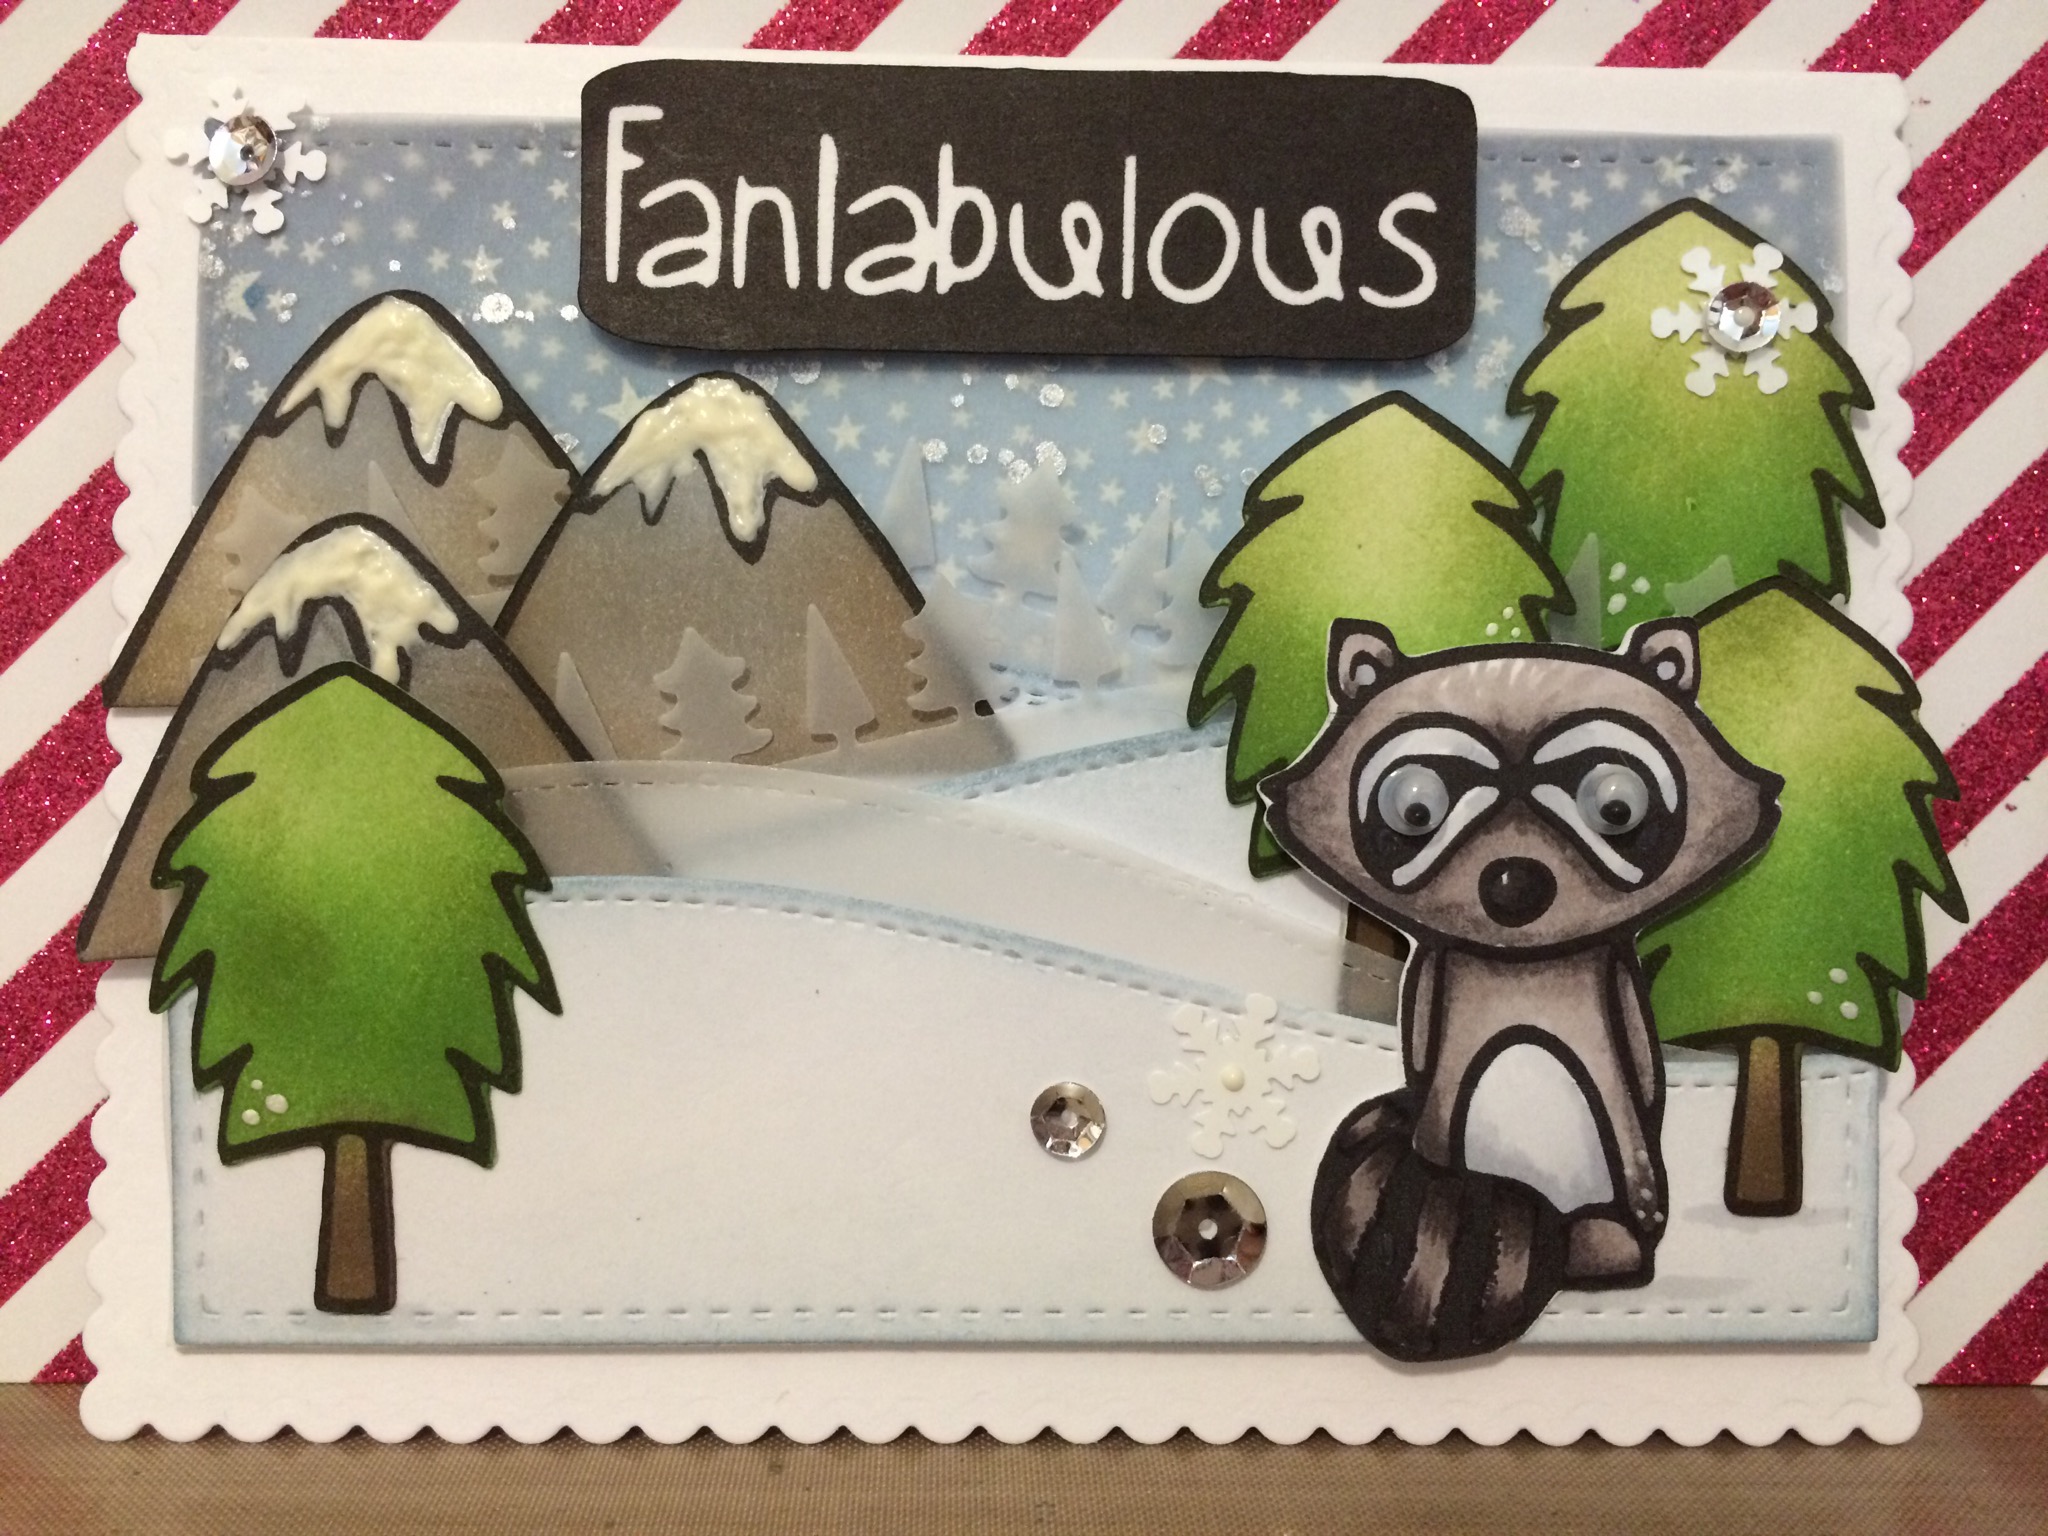
Today I’m sharing these cards I made just using this beautiful patterned paper I bought open stock and Stampin Up’s Snow Buddies stamp set.  This design paper has flocked snowflakes and a lot of shimmer so I’m having this paper do a lot of the work for me since it has beautiful designs already on it.  I cut the paper with the Lawn Fawn’s  Stitched large rectangle and I cut 2 pieces out so I can use both snowman images from Stampin Up’s Snow buddies stamp set.  These are last years stamp set but I LOVE these adorable snowmans so I am still going to use this over and over.  I also cut several snow borders using the Lawn Fawn’s stitched border dies to have some interest to the ground.  I stamped these images using the Hero Arts Die inks, which are one of my favorite black inks and I’m going to use my color pencils and gambol to blend the colors together.  It doesn’t need too much color since they are snowmans but I still wanted to create some depth and dimension.  I stamped out the sentiment on one of the snowbanks with “Hope your Christmas is snow much fun” at the bottom right corner.  I made the short and stubby snowman look like he’s juggling the snowballs and covered it using some stickler.  These are pretty simple cards and we need these simpler cards now and then to just simplify things a little:)  I hope you guys like these cards and please subscribe for more inspirations and ideas.  I have a full tutorial on this card on my youtube channel if you’re interested in watching!  Thank you so much and Much Mahalo

http://www.enjoyscrappin2.com
Youtube: http://youtube.com/channel/UCSmaap84Uvp7NPOcnJXGV9A
Instagram, Twitter, Flickr, Bloglovin
@enjoyscrappin2
#enjoyscrappin2

Paper Smooches Dec. Guest designer call!

SPARKS BADGEIMG_7275.JPG

IMG_7274.JPG

Aloha guys!

Today I’m sharing with you this card I made for the Paper Smooches December Guest Designer Search. Paper Smooches is one of my all time favorite stamp company. They have such cute stamps and I like their dies too because they make it do affordable. I made this card using the stamp set Word Up and Party Pals.  I cut out the vellum at 51/4×4 and also cut out a black frame and attached it together.  I also cut out a design paper with blue and white stripes I had in my stash and a white card stock the same size.  I then used Lawn Fawn’s speech bubble die and cut a portion off from the top so my sentiment I stamped on vellum will show up better.  I embossed the vellum with the Hello bubble word from Word up and embossed it using Ranger’s liquid Platinum.  I also stamped 3 balloons using the Party Pals and embossed it the same embossing powder and cut it out.  I stamped out the image from Party pals and cut the balloons off and decided to watercolor using my peerless watercolors.  I’ve never used these since I made the swatch and it took a little time to get use to it.  I didn’t give too much depth and dimension with using this watercolor.  I guess I need to play around with it more to control the colors more,lol.  Anyways, I strung up the balloons using some bakers twine and attached all the layers together putting foam adhesive on the main image.  I stamped out the words best wished on the vellum balloons with clear after stamping it with Versafine Onxy ink.  I attached some sequins and hearts I cut out using the Mama elephant confetti die and used black jelly pen on their eyes and some other places to give more interest.  It didn’t turn out as I envisioned but it turned out ok.  I hope you like this and please leave leave a comment if you like this video and subscribe for more inspirations and ideas.  Thank you so much for visiting:)  Much Mahalo

http://www.enjoyscrappin2.com
Youtube: http://youtube.com/channel/UCSmaap84Uvp7NPOcnJXGV9A
Instagram, Twitter, Flickr, Bloglovin
@enjoyscrappin2
#enjoyscrappin2

TAWS BIC-I was chosen as one of the Favorite Picks! Yay:)

BIC Runner upIMG_7158-0

Aloha Guys!

I am SUPER Excited to share with you that I was chosen as one of The Alley Way Stamps Be Inspired Challenge’s Favorite Pick.  Yay!!  I am Super Honored to be chosen as one of the Favorites amongst all the Fabulous Creations!!! Thank you Sooooo much!!   I love the Alley Way stamps and I love participating in their challenges.  Thank you so so much, much Mahalo:)

TAWS-DT Call!! Woohoo!!

TAWS-DT CallTAWS-DT Call

IMG_7271.JPG

IMG_7272.JPG

IMG_7270.JPG

Aloha Guys!
Today I’m sharing with you this card I made for The Alley Way Design Team Call!! I’m super excited that we get a chance to summit and be a part of a team for this great company! Ever since I found their stamps, I’ve been in love with them so I’m really crossing my fingers:)  I made lots of layers with this card because I wanted to create a winter scenery.  I used the stamp set Deep in the woods because I just Love love the raccoon, he’s super cute.  I used the stitched hillside borders and the tree borders from Lawn Fawn, another company that I just adore.  I cut both the card stock and vellum with both of these dies.  I also used the Mama Elephan’t Femm frame and cut my front panel and the card to give a different card shape.  It took a long time to make this card because of so many components but I had lots of fun making it.  I used Distress inks to color both the trees and mountains to give more texture to these items and colored the raccoon with my Shinhan touch alcohol markers.  All of the pieces have the cute stitch lines that match perfectly.  I do have a tutorial for this card which I’ll be posting as soon as I’m done editing it since it was a looong video.  I really hope you like this card and I want to thank you guys for leaving all the wonderful comments!  I Love to read your comments so please keep leaving them.  Please subscribe for more inspirations and ideas. I thank you guys soooo much:)

Much Mahalo

enjoyscrappin2@gmail.com

Youtube: http://youtube.com/channel/UCSmaap84Uvp7NPOcnJXGV9A
Instagram, Twitter, Flickr, Bloglovin
@enjoyscrappin2
#enjoyscrappin2

Stampin Up meets Prismacolor Nupastels

IMG_7268.JPG

IMG_7267.JPG

Aloha Guys!

Today I’m sharing with you this quick card I made using my Prismacolor Nupstels, my Stampin Up stamp called Holiday Homes, and the Hero Arts Tiny stars background stamps.  I do have a full tutorial on this card if you like to check that out on my Youtube Channel.  I did some stamp surgery here for this card and cut off the tree that’s suppose to be on the right side so I can use that tree separate from this landscape stamp.  You could just mask off the stamp and use it that way if you don’t like cutting your stamps.  I don’t mind cutting my stamps and I do this quite often to get more different uses out of it.  I used a watercolor paper for this card but you can just use your regular white card stock too since there won’t be too much moisture added to the background.  After stamping the tree and the landscape with  Stazon ink, I masked it off with some post it notes and used my embossing buddy to get off the static.  I then stamped the starry background using the Hero Arts Tiny star background.  This is a very versatile stamp set and I think it’s a must have.  I poured white embossing on it and heat it with my heat gun.  Now the embossing powder will resist the pastels.  I chose purple and several shades of Blues and scribbled across not being too neat about it and spread the color around using a baby wipe.  Since this pastels can be used with water, it mixes the color very well.  I’m trying to stretch out my products I have at home, that’s just collecting dust and playing around with them to see what I can create. I really liked this method and I plan to try watercoloring with it next and see how that turns out.  I usually don’t make too many Holiday cards since the cards I’ll be giving as gifts will mostly be for everyday use so they can use it throughout the year.  The Holiday Cards I’ll be making this year will be sent to Caring Hearts Card Drive!  I think it’s a great cause and I want to help if I can:).  Thank you so much for stopping by and please leave me a comment, I love to hear your comments:)  Please subscribe for more inspirations and ideas.  Much Mahalo!

http://www.enjoyscrappin2.com
Youtube: http://youtube.com/channel/UCSmaap84Uvp7NPOcnJXGV9A
Instagram, Twitter, Flickr, Bloglovin
@enjoyscrappin2
#enjoyscrappin2

Simon Says Challenge-Spectrum Noir and Newton’s Nook

wednesdayblog-logoIMG_7260.JPG

IMG_7262.JPG

Aloha Guys!
Today I’m sharing this card I made using Spectrum Noir Essentials set of the colored pencils with the New Newton’s Nook Winston’s Home for Christmas stamp set. I made this Card and a video showcasing Spectrum Noir pencils and it just so happens that Simon Says challenge for this week is also showcasing these pencils. It was meant to be entered in this  challenge, lol. I stamped out the Winstons home for Christmas set on a Kraft card stock and I blended the pencils not using Gamsol this time but just the pencils themselves to see how it blends on their own. I wanted to try it out before I purchased the other sets so I thought I’d share them with you guys, incase you were also wondering how these pencils work. I really loved the way these pencils blend well on their own and I also ordered the rest of the sets (besides the marine) because they were sold out.  I love coloring just in general so I love Colors so when new products come out, I like to try them out to see how they work.  These pencils come in 5 sets, Essentials, Florals, Marines, Nature and the Primary and it’s suppose to have 3 shades of each color to make it easier to blend.  I did realize that not al the colors are light, medium and dark but it varies depending on the color.  I decided to color on dark kraft card stock to see how they show up.  If you like to see a full tutorial on these pencils, please check out my youtube channel for the video on how I made this card.  Thank you guys so much for visiting and please subscribe for more inspirations and ideas.  Much Mahalo!

http://www.enjoyscrappin2.com

http://youtu.be/cBR21ruGuukYoutube: http://youtube.com/channel/UCSmaap84Uvp7NPOcnJXGV9A

Instagram, Twitter, Flickr, Bloglovin
@enjoyscrappin2
#enjoyscrappin2

Paper Smooches New Release Blog Hop

Aloha Guys!

Check out this Paper Smooches New Release Blog Hop.  I Love Paper Smooches Stamps and dies and I can’t wait until tonight so I can place my order.  You may be able to win some Great Prized on this Hop so hop on along:)

http://papersmooches.blogspot.com/2014/10/october-ps-dt-blog-hop.html?utm_source=feedburner&utm_medium=email&utm_campaign=Feed%3A+PaperSmooches+%28Paper+Smooches%29

Newton’s Inky Paws Challenge #15-Add a Little Sparkle

NNDIPC_15_SparkleIMG_7246.JPG

IMG_7247.JPG

Aloha Guys!
Today I’m sharing with you this card I made for the Newton Nook’s Inky Paws Challenge. Which was to Add a little Sparkle to your Project! I used my Mama Elephants Femme Frame dies and cut a black glitter paper with the stitched rectangle die and also cut out the scalloped die with some vellum. I stamped out one of the ghost Newton from the Boo Crew in MFT hybrid black ink onto my watercolor paper. I also cut out a round stitched circle from the MFT stitched circle die and a hill using Lawn Fawn’s speech bubble landscape die. I watercolored all the components with some distress ink pads mixed with shimmery water to give a shimmer in the images. You can’t really see the shimmers on the picture but in real life, the shimmer is beautiful. I attached the black glitter rectangle onto my vellum and attached the whole thing on a A2 size tangelo twist card base! I hope you like this card and thank you so much for visiting and I’ll have a full tutorial for this card on my YouTube channel! Please subscribe for more inspirations and ideas.

Much Mahalo

http://youtu.be/M81pMmWDzboYoutube: http://youtube.com/channel/UCSmaap84Uvp7NPOcnJXGV9A
Instagram, Twitter, Flickr, Bloglovin
@enjoyscrappin2
#enjoyscrappin2

Simple Rainbow Card Using Sharpies

IMG_7242.JPG

Aloha guys!

Today I’m sharing this super simple card utilizing your regular sharpies! I just scribbled different colors onto this Glossy card stock. While back I bought a rim of glossy card stock but I never used it. You can also use a photo paper for this too if you don’t have glossy card stock. After scribbling all the colors I wanted, I used some denatured Alcohol in a dropper and just dropped it here and there on the colors. It created this really cool effect! So I just dropped more and more. You can just use a regular alcohol too. I have my alcohol in a spray so I sprayed that too. Just play with it and have fun! I also cut out a frame using black card stock and put it on top of the rainbow cardstock. I originally was going to put vellum on top but it converted up all the fabulous colors so I decided not to and left it as is with the black frame. I cut out the word thanks multiple times and attached all 5 together. I put some finishing touches and added some gold stars I cut out using glitter paper. I have a tutorial on my YouTube channel if you’d like to check it out. Thanks for visiting and please subscribe for more inspirations and ideas!
Much Mahalo,

http://www.enjoyscrappin2.com
Youtube: http://youtube.com/channel/UCSmaap84Uvp7NPOcnJXGV9A
Instagram, Twitter, Flickr, Bloglovin
@enjoyscrappin2
#enjoyscrappin2